Watchguard Firebox x550e/x750e/x1250e – pfSense

Overview

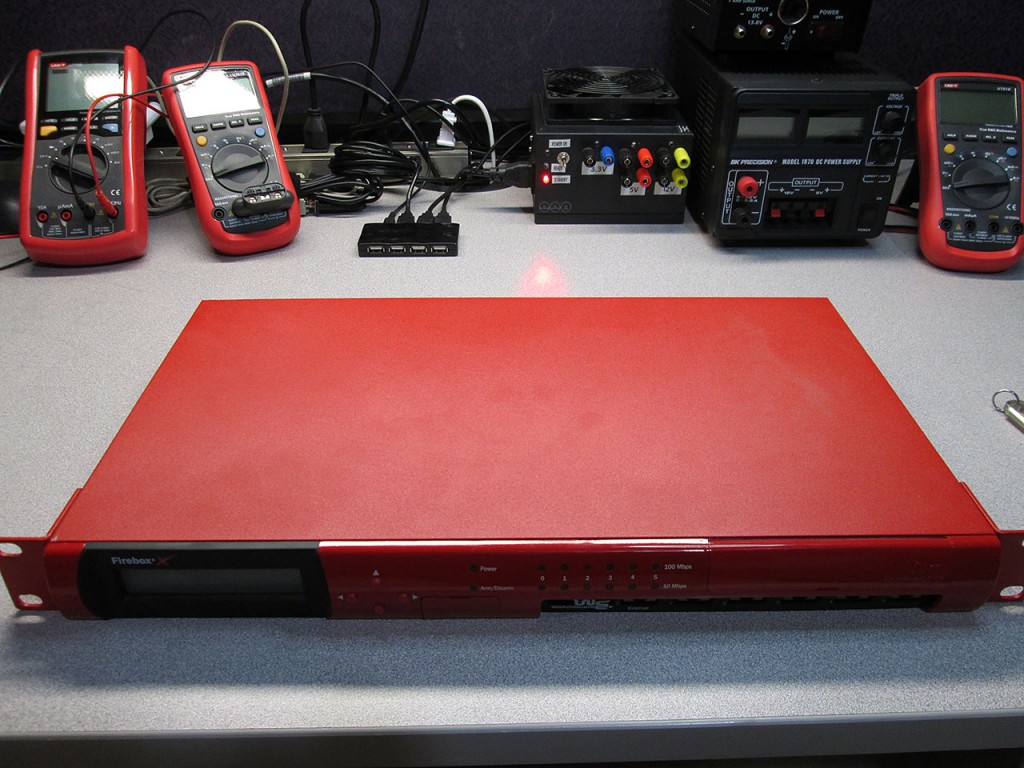
Last week I picked up this Watchguard Firebox x500 for cheap to experiment with. It turned out to be a great success so it was time to try it for “real” on better, faster, production capable hardware. I’ve been following this thread with great interest for a while, a few guys in the thread spent a lot of time getting these things working with pfSense. If it wasn’t for these guys, this conversion would be extremely time consuming if not impossible.

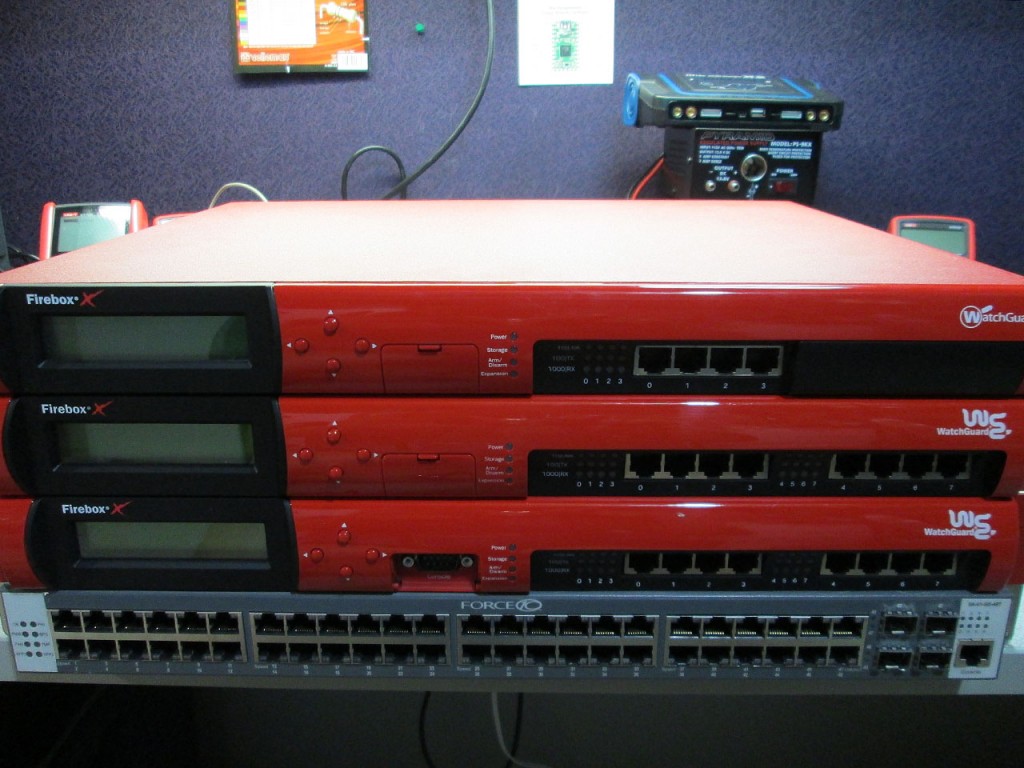
I’ve bought 3 Fireboxes on eBay, x550e, x750e and an x1250e. Even though they are all different models and WatchGuard sells them as products with increasing price/performance for each higher model, the actual hardware inside these firewalls is almost identical.

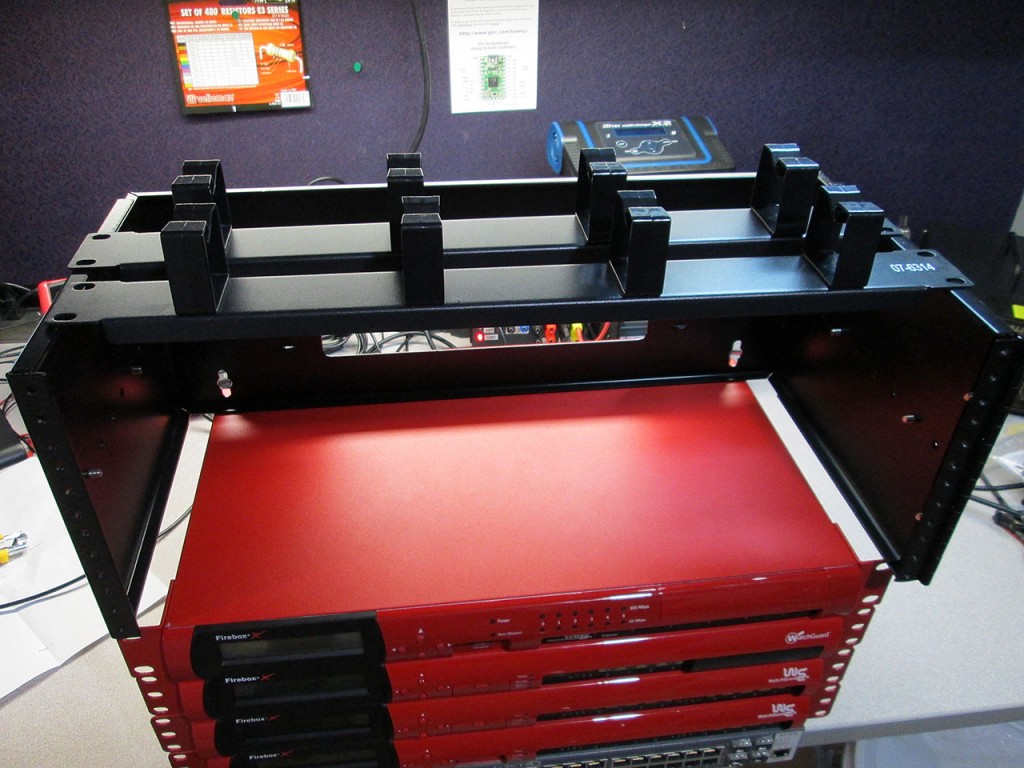
The “e” series Fireboxes are significantly deeper than the x500/x700 series, which turns out is actually too long for the 4U bracket I bought for the uplink shelf. The x750e is 14″ deep and it still requires another 2″ to accommodate the power plug. The Firebox x500 comes in at 9″ plus the plug.

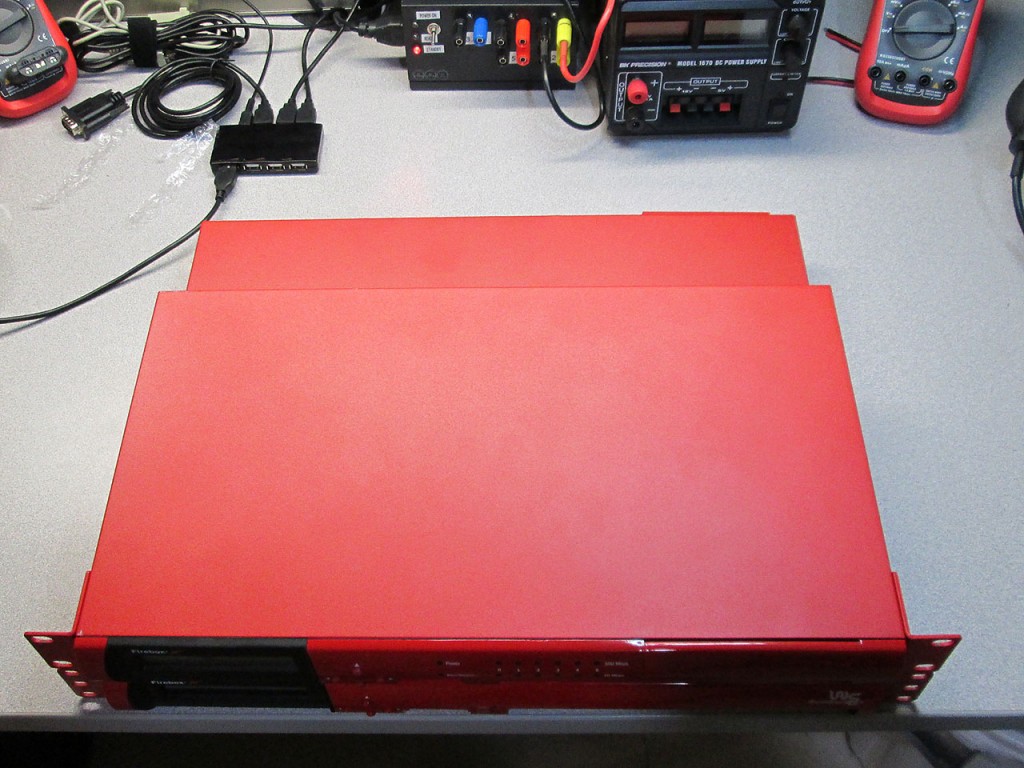
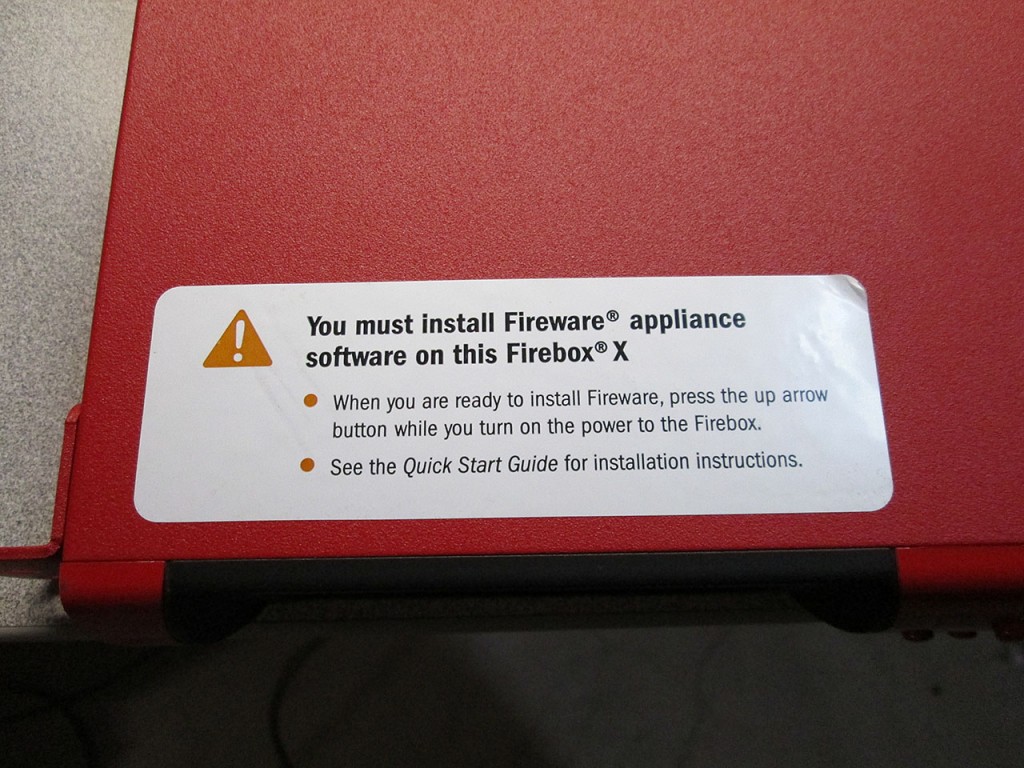
I’ve started with the mid-level Core x750 as the Guinea pig. A bit of irony with the sticker asking to install Firebox software. It’s never gonna happen.

Force10 S50 Racking

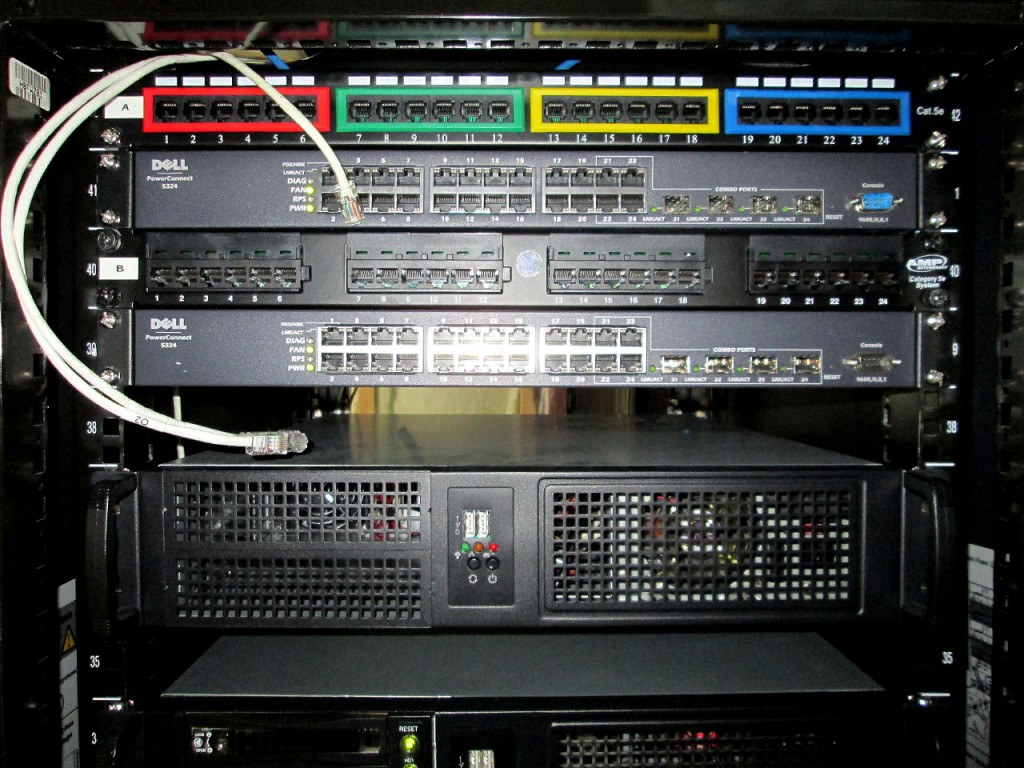
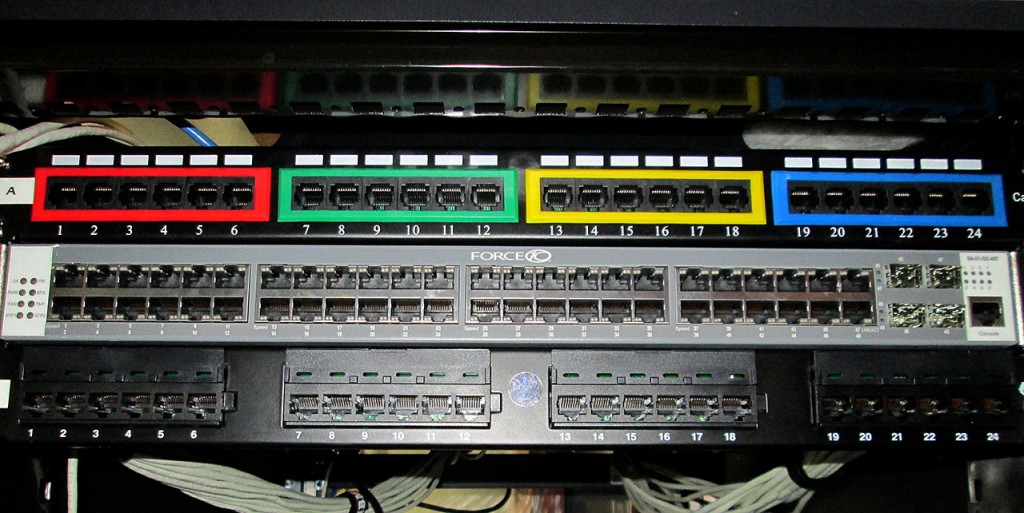
It’s time to put the Force10 S50 into use. This means unfortunately a lot of work as it involves taking down all the virtual and physical servers, pulling all the wiring, the original switches, rewiring everything from scratch and documenting all patch panel and port changes. I use a Visio document to keep track of each patch panel and switch port mappping. Also use it to map out all my networks at home and at the various data centers.

Pulled all the patch cords out.

Pulled the two Dell 5324’s and racked the Force10 switch up.

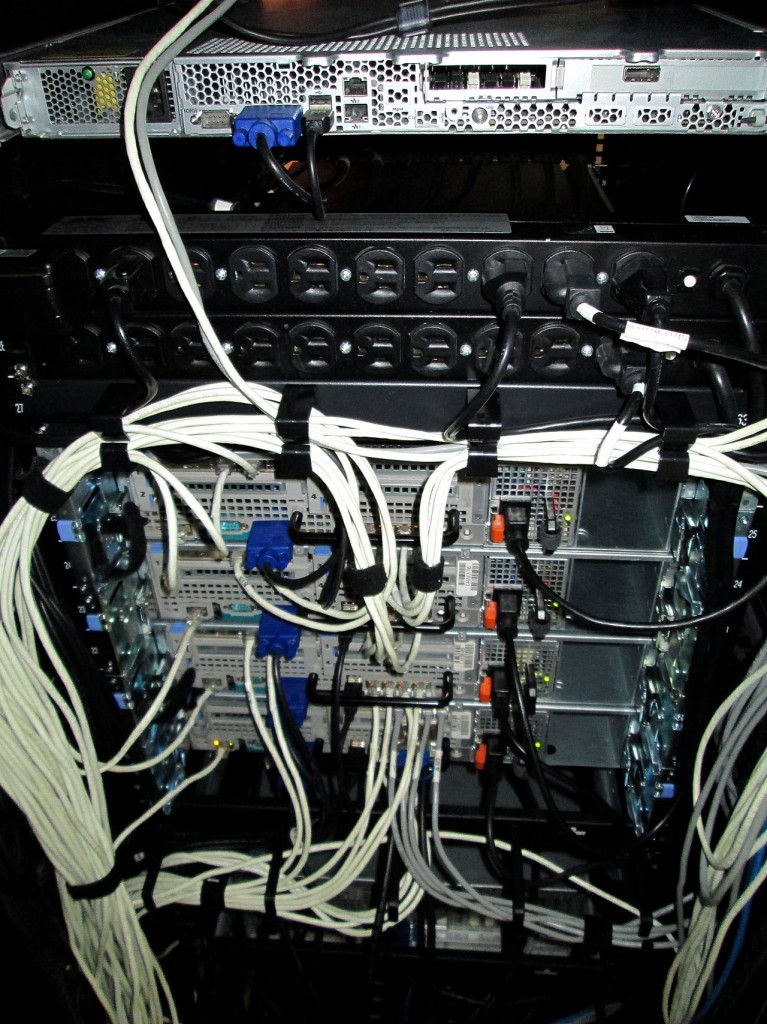
Completely rewired the back of the servers. Organized the cables better so that pretty much all connections to each server are sequential. In original setup I had each switch perform a different role. One was strictly for SAN/NAS traffic, the other was for LAN/DMZ/Web traffic. With a single switch now, all that will be split strictly via VLAN so it makes the wiring much, much simpler and easier to follow.

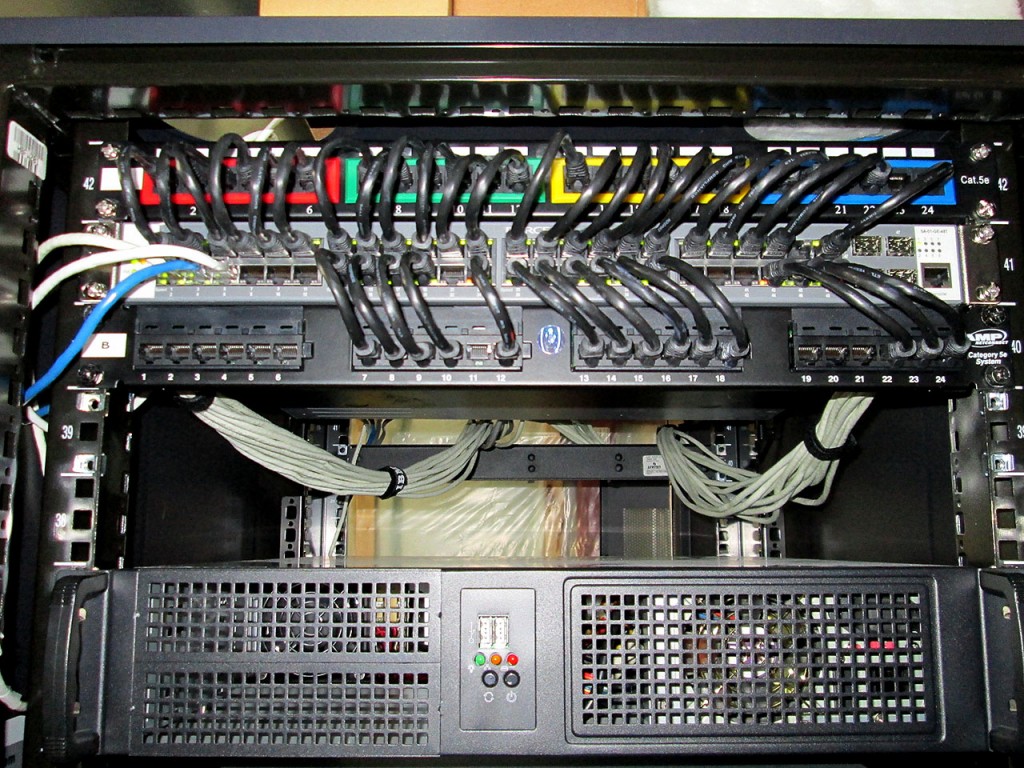
Everything connected and running again. The only thing left to configure is LAGs to connect to two other switches. I want to make sure that the switch runs fine and performance is optimal before playing with LAG/LACP and Spanning Trees.

The whole process of swapping switches and rewiring took me almost 6 hours. Though a lot of that time was spent planning the layout and documenting the ports.

Force10 S50

Over the years I’ve been adding more and more hardware to my home network. This led to a big increase in network complexity, especially once I started adding multiple managed switches. Got to a point where I had 4 managed switches + 4 unmanaged switches running the house. Combined with many VLAN’s across switches, LAG groups and Spanning Trees, things got pretty crazy. So, I’ve decided to simplify the setup a bit. Get rid of some of the switches and change the network layout to a proper star topology with one core switch in the center.
For the core switch, I needed something fast. A switch that will be able to handle all the traffic I can throw at it, but also cheap, cause I’m on a budget.

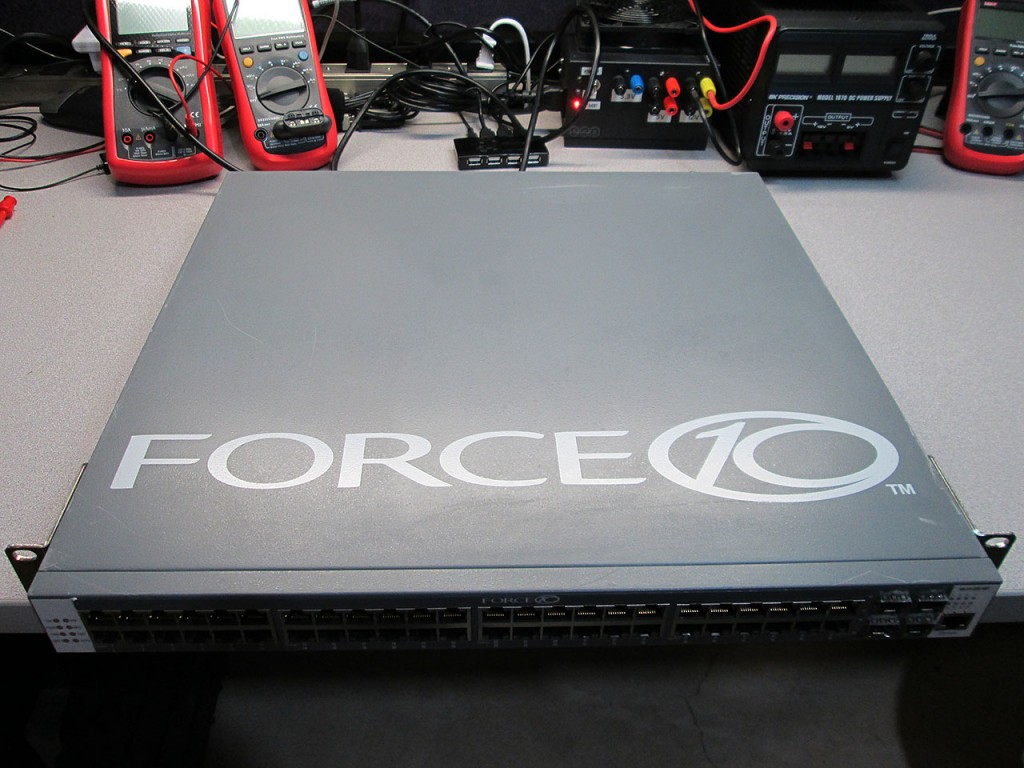
So I ended up buying this Force10 S50 switch on eBay. Hoping to replace the two Dell 5324’s I have in the main rack and have it act as my core switch. These Force10 switches are supposedly incredibly fast. They’re known for their super low latency which is perfect for an iSCSI setup I’m planning.

To be perfectly honest I’ve never heard of the Force10 brand, but a friend of mine who’s something of a networking guru highly recommended it. The price was definitely right and since this switch used to cost over $6K (+$5K L3 Routing Option), it was definitely a high end switch in its time.

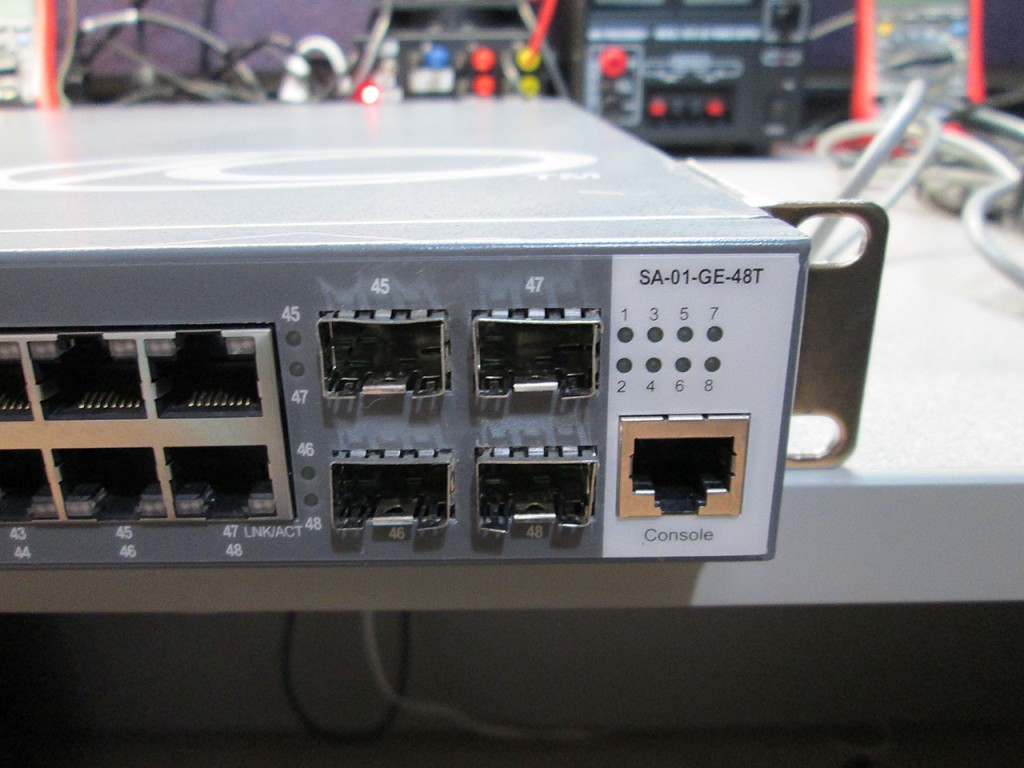
The Force10 S50 is a 48 Port, Gigabit, Managed Layer 2 Switch / Layer 3 router. This particular model is SA-01-GE-48T, running SFTOS, which is kind of a bummer as it can not be upgraded to the more recent FTOS but it shouldn’t be too big of a deal if the switch works correctly.

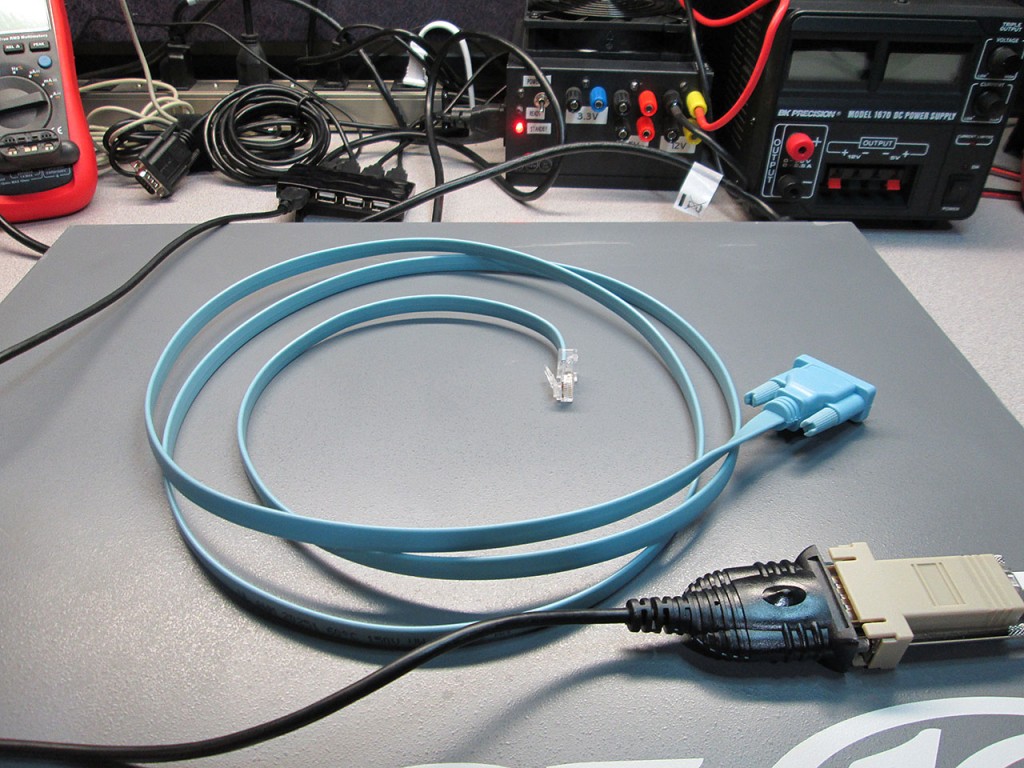
This switch uses an RJ45 connector for console access which I believe is the same as most Cisco switches. It’s still a regular serial RS-232 port but with a different plug. Not exactly sure what the reasoning behind this is.

It so happened that I had an RJ45 to DB-9 cable kicking around that was still in its original packaging, since I’ve never had to use it before. All my current switches are standard DB-9 plugs but I tend not to toss cables unless I have oodles of them.

However, turns out that whatever that cable came with used different signal paths as it didn’t work with the S50. The switch didn’t show any output during it’s bootup sequence.
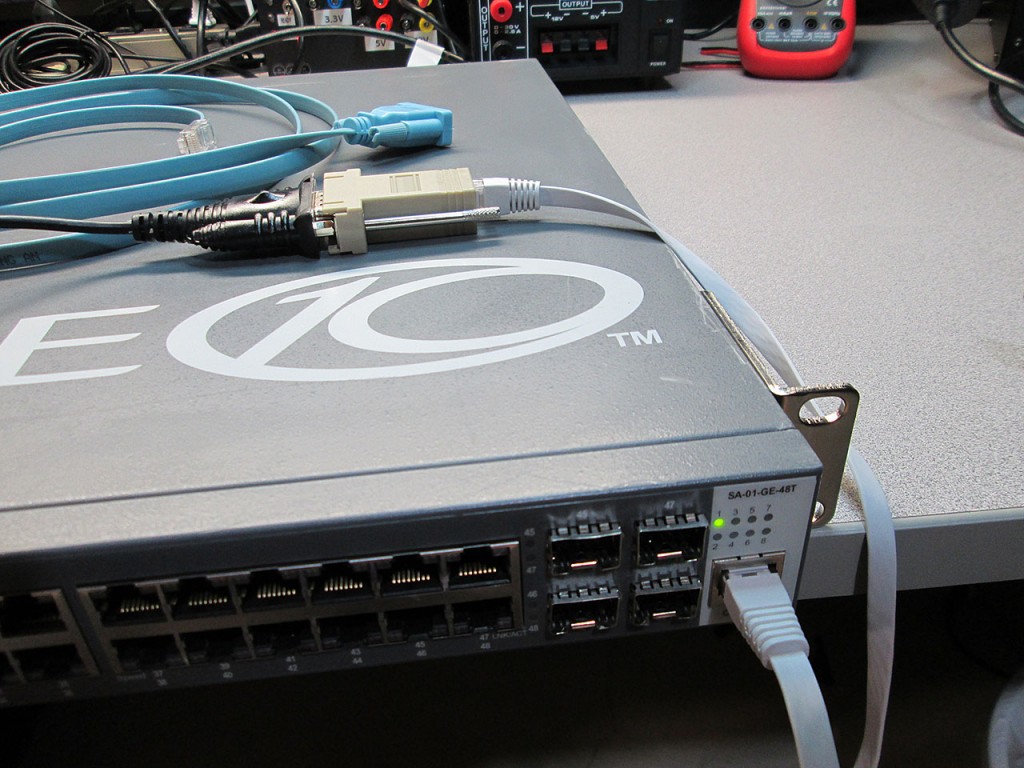
Luckily, I also had a converter plug that plugs into a DB-9 socket but also has an RJ-45 plug in it. Using a standard network patch cable worked in this case and I was able to communicate with the switch via PuTTY.

Powered up the switch. I was surprised to find out how quietly it ran, considering several small fans are used in it. Not that it matters too much as the servers occupying the same rack will drown out any other noise.
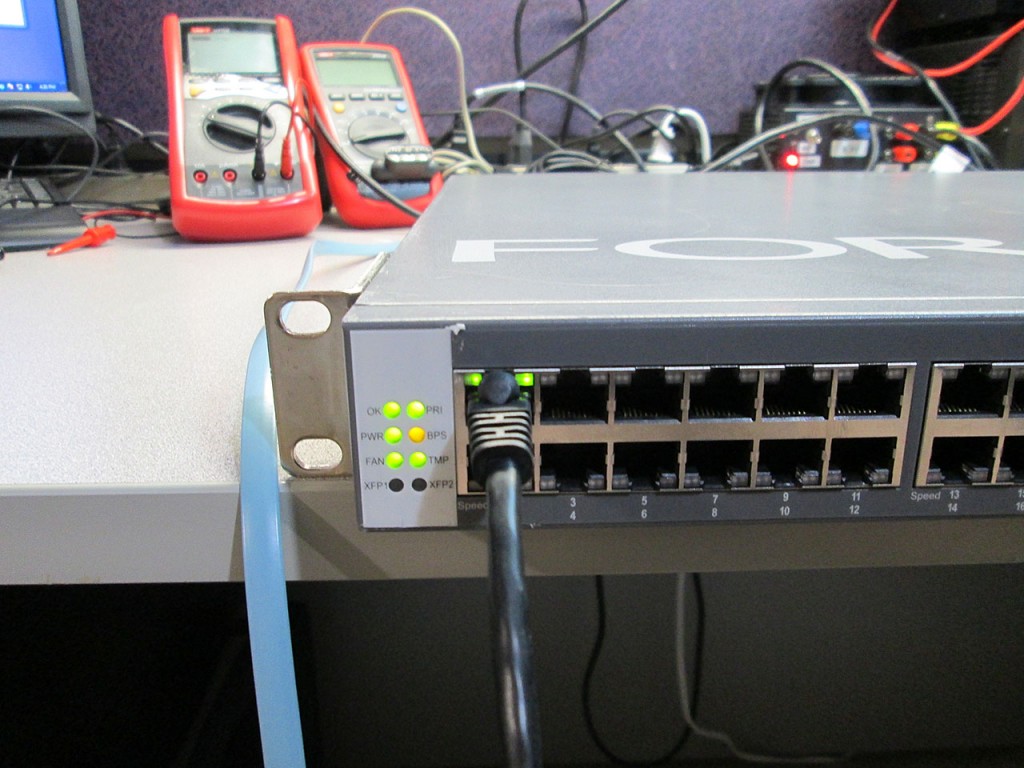
The system booted up and ran a self diagnosis with no issues. The BPS LED is amber due to the fact that there’s no Backup Power Supply hooked up. The power draw on the switch is about 90W which seems a bit high, I’m curious to see if that usage goes up when the switch starts moving traffic.

More Toys!

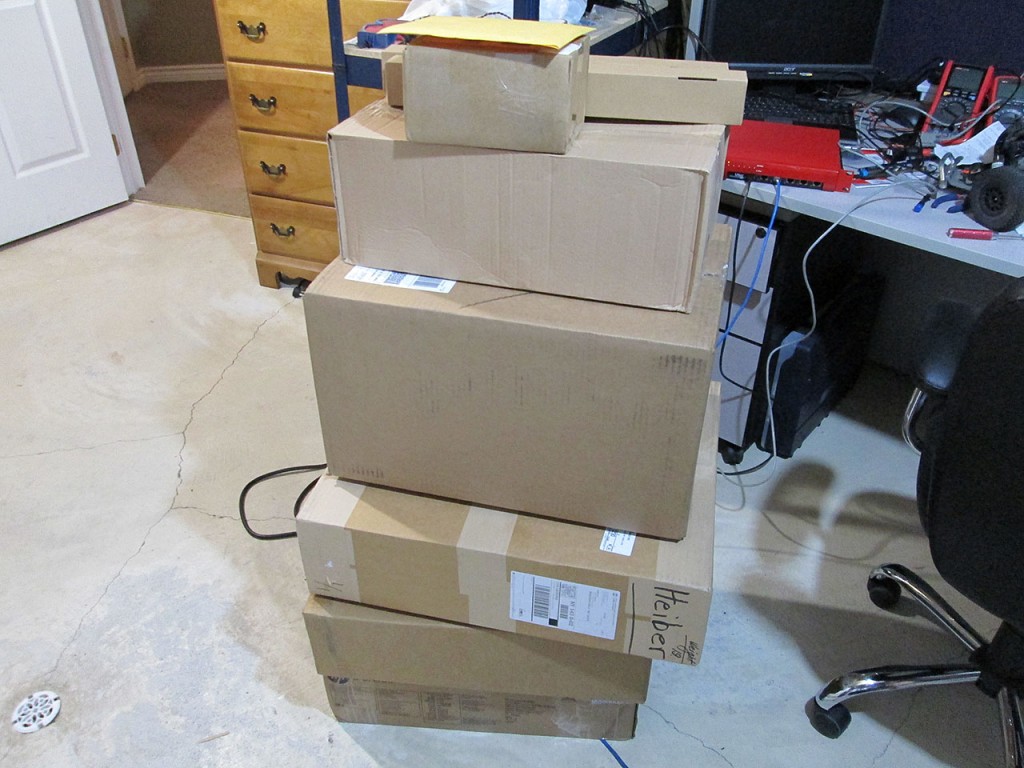
Made a quick trip to CBI today to pickup some eBay purchases waiting for me there. Looks like Christmas came early this year. 🙂

3 WatchGuard Firebox Firewalls (x550e, x750e and x1250e) and a Dell Force10 S50 L2/L3 switch…

…and a new 4U bracket for my uplink wall, replacing an existing 2U bracket.

Also a whole bunch of Dual Port Intel PRO/1000 NICs and few CPU’s for the firewalls.

It’s going to be a fun next few days getting everything working.

Build ffmpeg under Centos 6 x64

Installing ffmpeg under CentOS with all the plugins enabled is no easy task apparently. The only way to get it working properly is to build it from scratch. This process was compiled from lists and forums on the internet

Add DAG Repo to your Yum Repo list if it’s not already added. Run Update to make sure everything is in sync.

rpm -Uhv http://packages.sw.be/rpmforge-release/rpmforge-release-0.5.2-2.el6.rf.x86_64.rpm
yum -y update

Install all tools and libs necessary to build

yum install SDL-devel a52dec a52dec-devel alsa-lib-devel faac faac-devel faad2 faad2-devel
yum install freetype-devel giflib gsm gsm-devel imlib2 imlib2-devel lame lame-devel libICE-devel libSM-devel libX11-devel
yum install libXau-devel libXdmcp-devel libXext-devel libXrandr-devel libXrender-devel libXt-devel
yum install id3tag-devel libogg libvorbis vorbis-tools mesa-libGL-devel mesa-libGLU-devel xorg-x11-proto-devel 
yum install xvidcore xvidcore-devel zlib-devel amrnb-devel amrwb-devel
yum install libtheora theora-tools glibc gcc gcc-c++ 
yum install autoconf automake libtool make ncurses-devel
yum install libdc1394 libdc1394-devel yasm nasm
yum install libvpx*
yum install git-core opencore-amr-devel

Install Codecs

cd /tmp
wget http://www8.mplayerhq.hu/MPlayer/releases/codecs/all-20110131.tar.bz2
bunzip2 all-20110131.tar.bz2; tar xvf all-20110131.tar
 
mkdir /usr/local/lib/codecs/
mkdir /usr/local/lib64/codecs/
cp all-20110131/* /usr/local/lib/codecs/
cp all-20110131/* /usr/local/lib64/codecs/
chmod -R 755 /usr/local/lib/codecs/
chmod -R 755 /usr/local/lib64/codecs/
cd /tmp
rm -rf all-201110131*
cd /tmp
wget http://downloads.xiph.org/releases/ogg/libogg-1.3.0.tar.gz
tar xzvf libogg-1.3.0.tar.gz
cd libogg-1.3.0
./configure
make
make install
cd /tmp
rm -rf libogg*
cd /tmp
wget http://downloads.xiph.org/releases/vorbis/libvorbis-1.3.3.tar.gz
tar xzvf libvorbis-1.3.3.tar.gz
cd libvorbis-1.3.3
./configure
make
make install
cd /tmp
rm -rf libvorbis*
cd /tmp
wget http://downloads.xiph.org/releases/theora/libtheora-1.1.1.tar.gz
tar xzvf libtheora-1.1.1.tar.gz
cd libtheora-1.1.1
./configure
make
make install
cd /tmp
rm -rf libtheora*
cd /tmp
git clone http://git.chromium.org/webm/libvpx.git
cd libvpx
./configure --enable-shared --extra-cflags=-fPIC
make
make install
cd /tmp
rm -rf libvpx*
cd /tmp
wget http://downloads.sourceforge.net/opencore-amr/vo-aacenc-0.1.2.tar.gz
tar xzvf vo-aacenc-0.1.2.tar.gz
cd vo-aacenc-0.1.2
./configure --enable-shared
make
make install
cd /tmp
rm -rf vo-aaenc*
cd /tmp
git clone git://git.videolan.org/x264.git
cd x264
./configure --enable-shared --extra-cflags=-fPIC --extra-asflags=-D__PIC__
make
make install
cd /tmp
rm -rf x264*

Configure libraries

export LD_LIBRARY_PATH=/usr/local/lib/
echo /usr/local/lib > /etc/ld.so.conf.d/custom-libs.conf
ldconfig

Build ffmpeg

cd /tmp
git clone git://source.ffmpeg.org/ffmpeg.git
cd ffmpeg
git checkout n1.0
./configure --enable-version3 --enable-libopencore-amrnb --enable-libopencore-amrwb --enable-libvpx --enable-libfaac \
--enable-libmp3lame --enable-libtheora --enable-libvorbis --enable-libx264 --enable-libvo-aacenc --enable-libxvid --disable-ffplay \
--enable-shared --enable-gpl --enable-postproc --enable-nonfree --enable-avfilter --enable-pthreads --arch=x86_64 --extra-cflags=-fPIC
make
make install
cd /tmp
rm -rf ffmpeg*

All Done.

WatchGuard Firebox X500 – pfSense Hack

Overview

I’ve been using pfSense for a few years but almost always on a dedicated PC or a virtual machine. For a while now I’ve been toying with the idea of getting pfSense running on an actual firewall box. The advantage of running it on an actual firewall is twofold, size and power draw. Plus, it’s common hardware, easier to develop.

I picked up this WatchGuard Firebox X500 Core from Kijiji. Price was great and best of all the guy was about 5 minutes away from me.

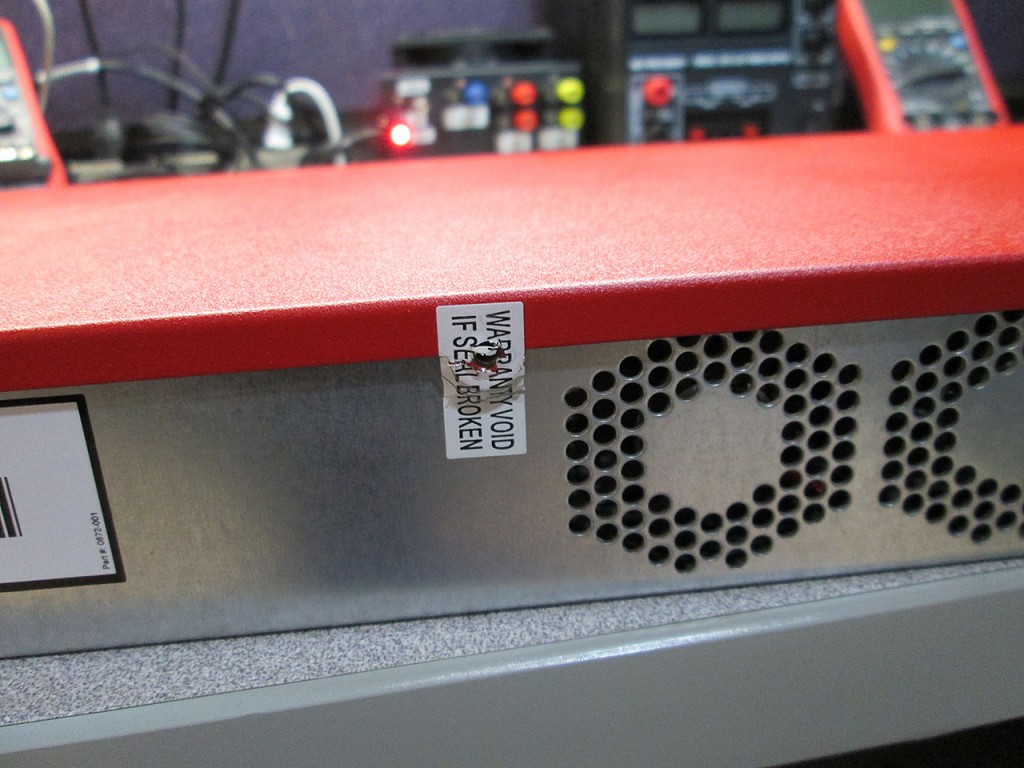
As soon as I got home I wasted no time taking it apart. Removing the final screw behind the Void Warranty sticker was quite satisfying.

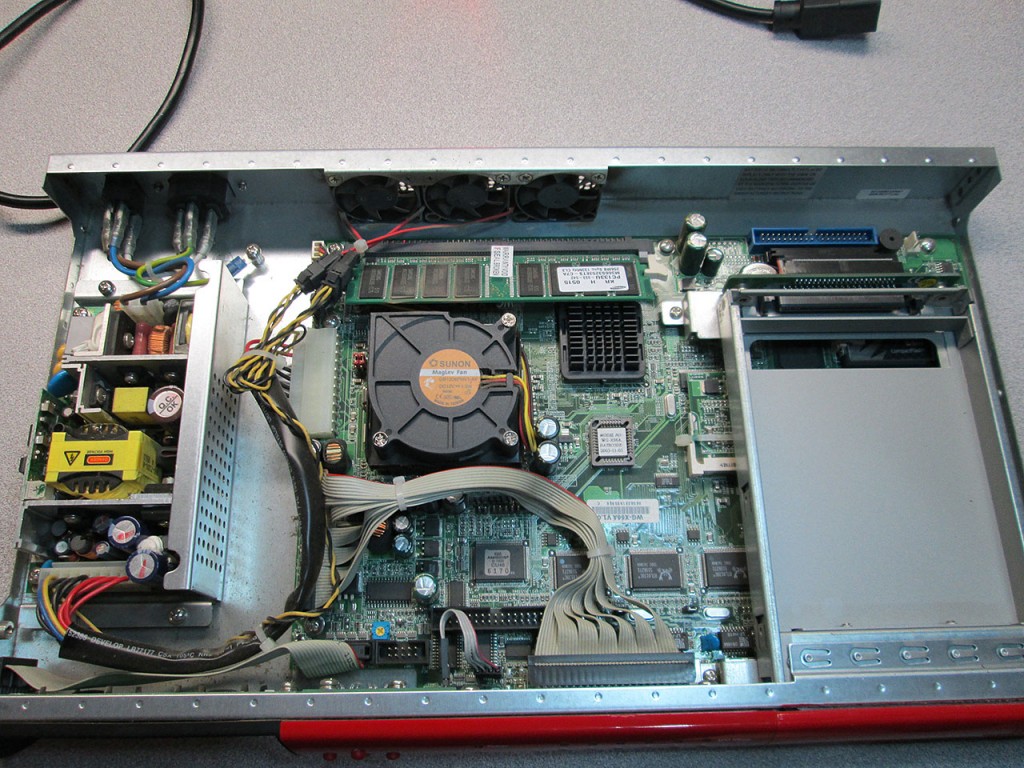
The interior guts of the firewall. Ugh. Disgusting filthy inside, must have been running in some crappy closet.

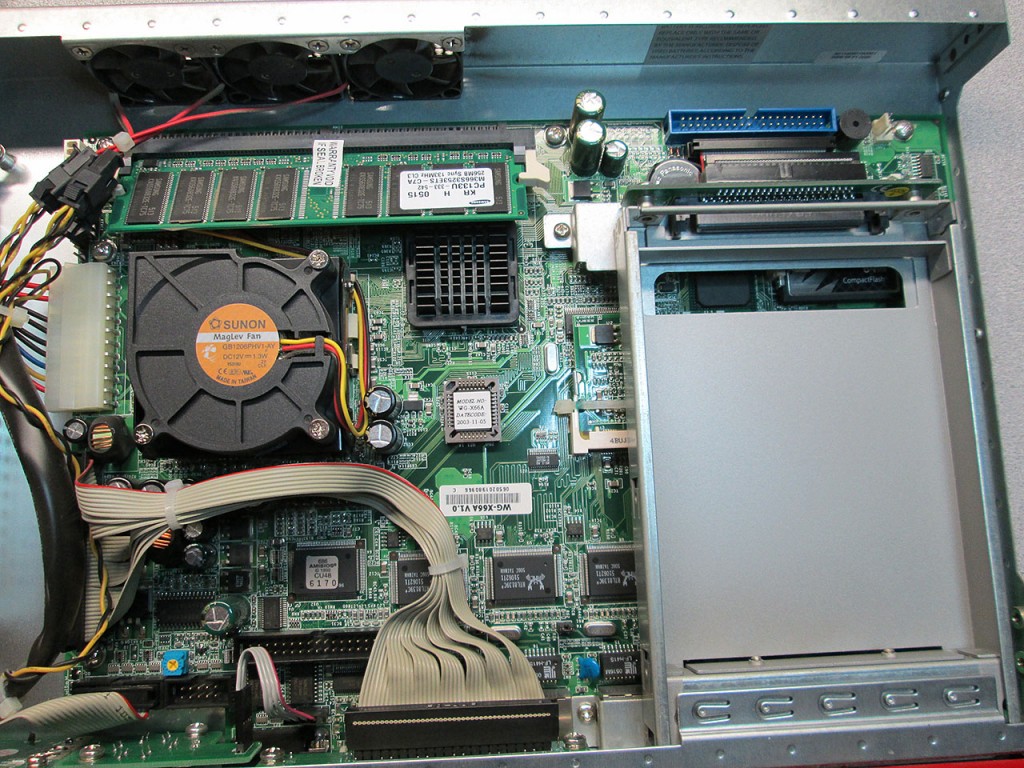
Some good blasts of air and it looks much better. Now to analyze the components. The WatchGuard Firefox is essentially just an x86 PC. The motherboard implements Intel 815 Chipset.
It comes with an Intel Pentium III based Celeron M 310 1.2Ghz as its processor. There’s a possibility of upgrading this CPU to a faster processor like the SL8BA,SL8BG Pentium M 1.7Ghz or SL6N5 LV version of Pentium M 1.7Ghz. The firewall comes with 6 10/100Mbit Ethernet Ports. These ports are driven by on-board Realtek chips. Even though one of the ports is designated as WAN, in pfSense any port or combination of ports can be used for WAN functionality.

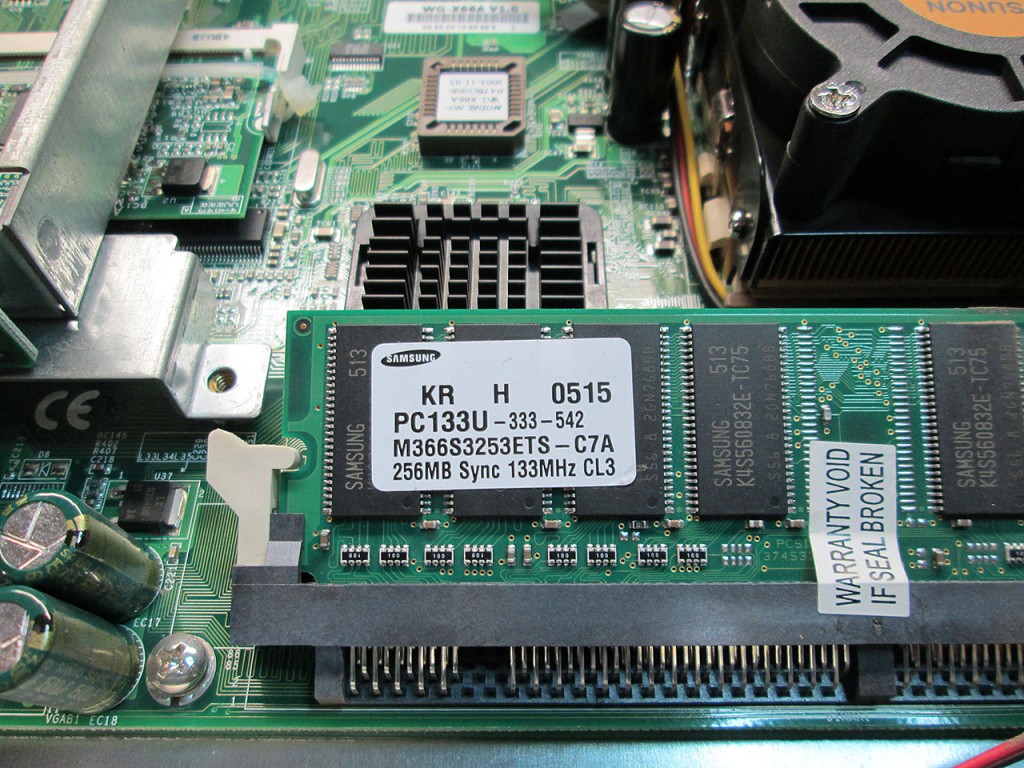
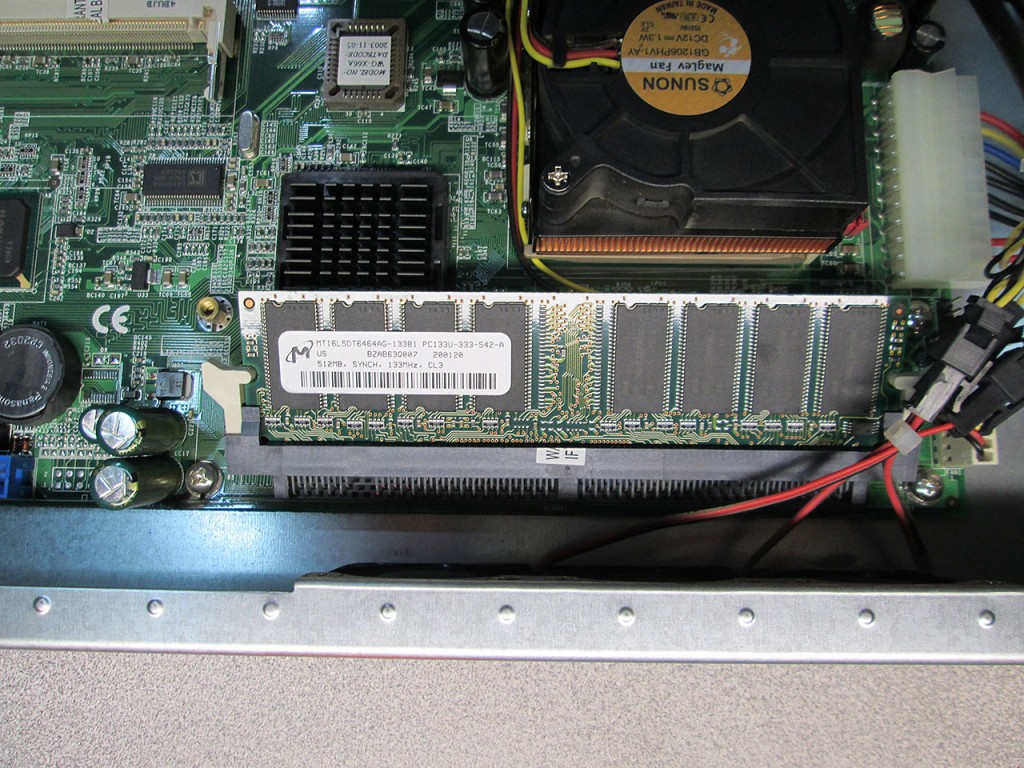
The Firebox also comes with 256MB of PC-133 Non-Ecc Memory. The chipset supports up to 512MB so I asked around and a buddy of mine happened to have a few 512MB sticks.

Had to break another seal, another proof of voided warranty.

OpenIndiana Server + Napp-It

Installation

It’s been a while since I looked at other filers as NexentaStor pretty much satisfied all my requirements. But some of the limitations of NexentaStor still bother me, plus there’s some questions regarding their rather vague licensing model.

One of the options I’ve looked at a while ago was OpenIndiana and Napp-It. Last time I looked at Napp-It, it was still in early stage of development. It’s been a few years since I last tried it so hopefully the project is a lot more mature now.

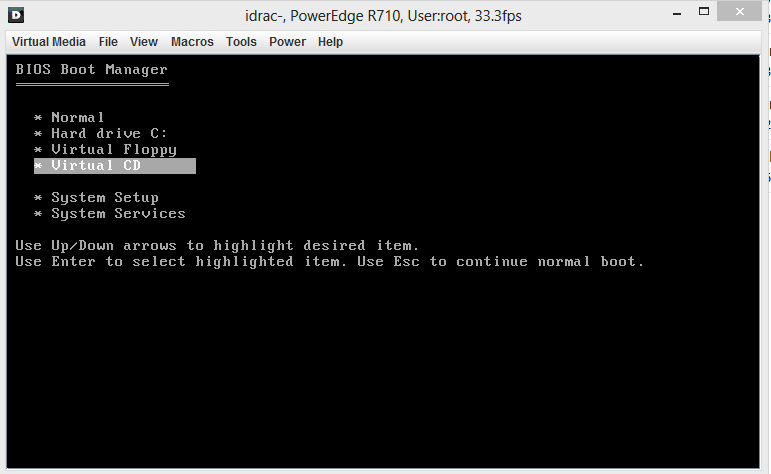
First step is to download the iso image for OpenIndiana. This time I’m doing the install entirely through the Dell’s R710 iDRAC (which I admit I completely forgot about).

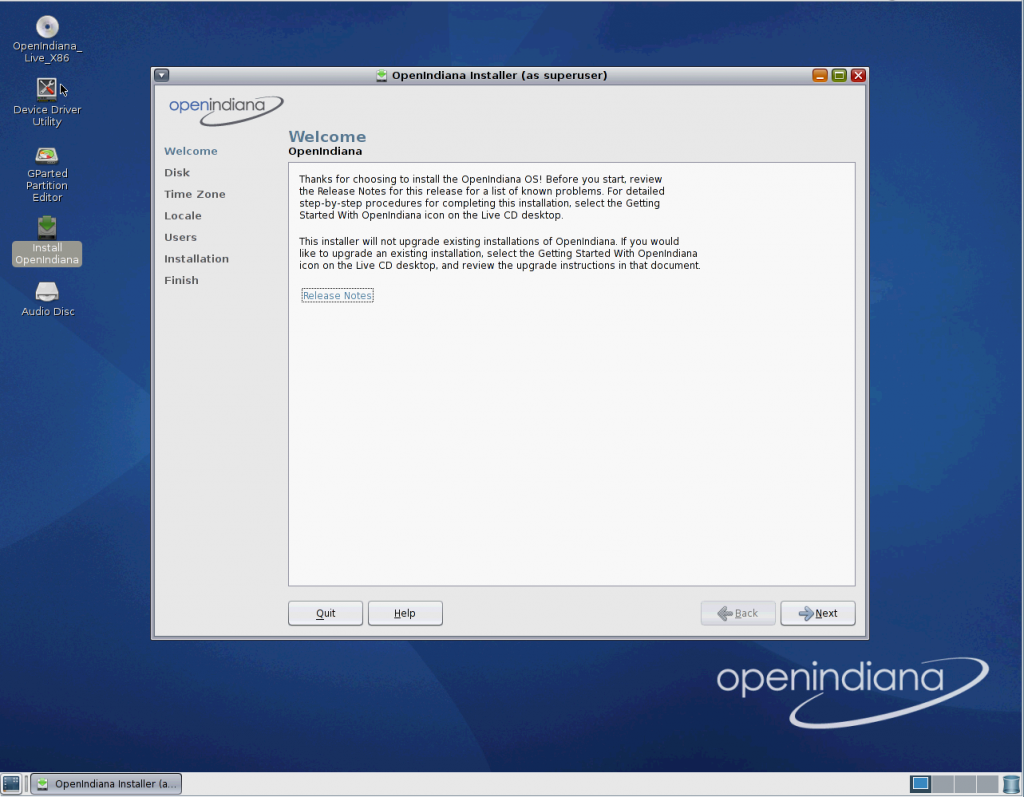
Installation is a pretty straightforward, wizard based process.


Installation was a bit slow over iDrac but finally completed and upon reboot I was greeted with a login screen.

Time to configure networking and SSH so I can configure the rest of the box faster. One option is to configure the networking via the UI or via the console. In this case I’ll configure the first interface via the UI.

To Enable SSH Root Access:

Enable PermitRootLogin

nano /etc/ssh/ssd_config 

Disable Console Root Restriction

nano /etc/default/login

Remove “;type=role”

nano /etc/user_attr

finally, restart the service

svcadm restart ssh

Finally configure routing and DNS

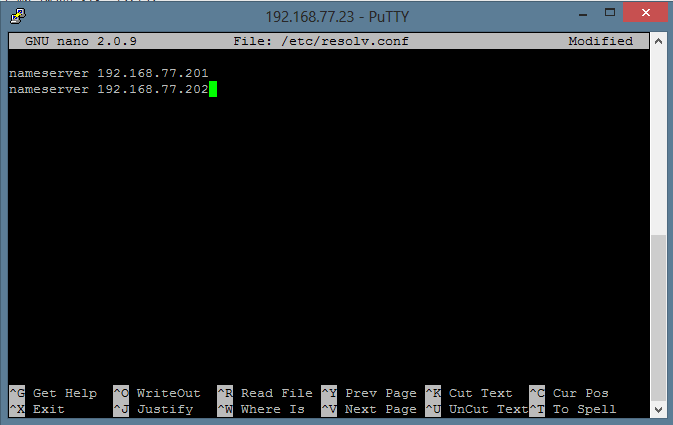
nano /etc/resolv.conf

NexentaStor Server – Part 3 – Internal Benchmarks

Now that NexentaStor is fully configured. Time to do some benchmarks. From eperience random IO was always wicked fast but I found that sequential performance was really dependent on the CPU speed in terms of CPU frequency. In my previous builds typical speeds were about 300MB/s writes and 500MB/s reads. Let’s see if this new server can beat that.

All drives are 146GB 15K SAS Drives.

During these tests Deduplication and Compression are turned off in order to only factor the disks in the equation.

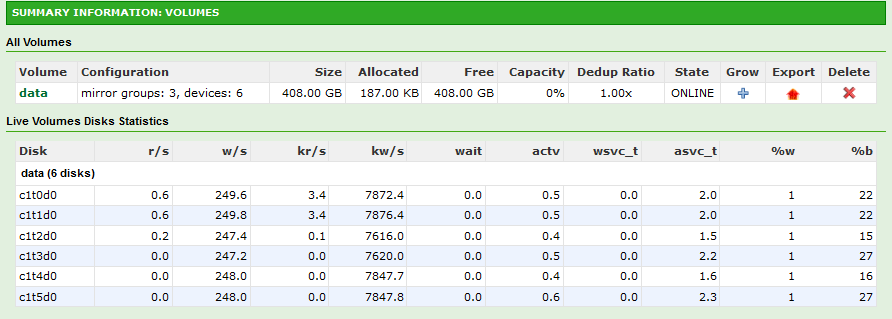
Config: 3 Groups, 2 Drive Mirrors = 6 Drives on SAS6IR. Sync On.
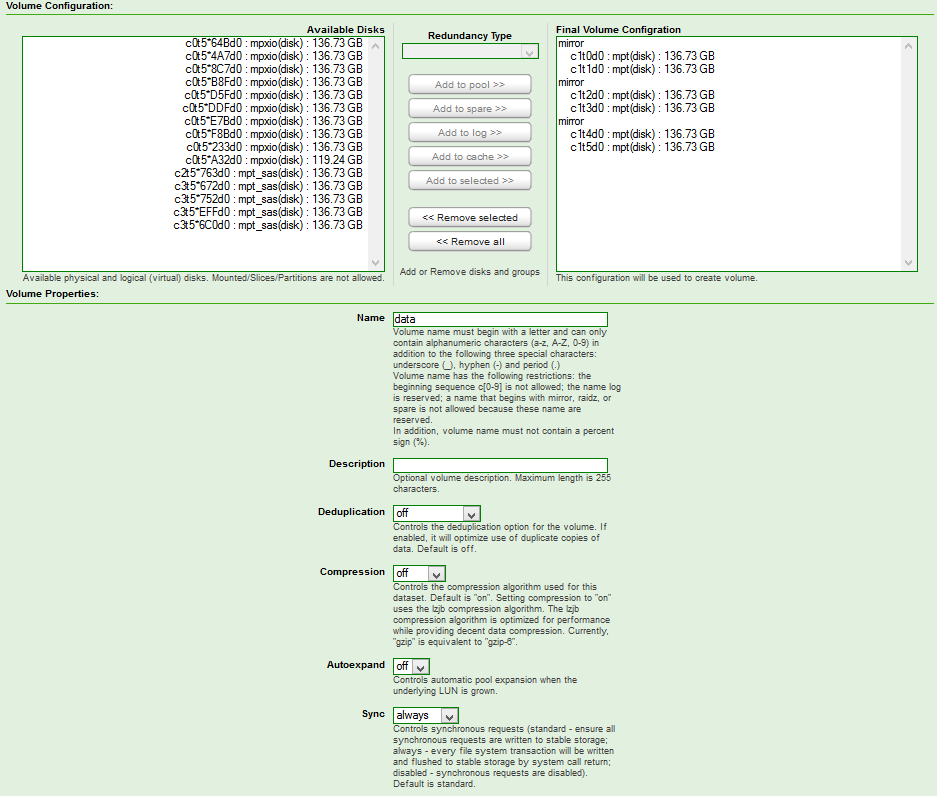
Using DD to generate a sequential write in 16k blocks.

> dd if=/dev/zero of=ddfile1 bs=16k count=3M
^C62850+0 records in
62850+0 records out
1029734400 bytes (1.0 GB) copied, 100.685 seconds, 10.2 MB/s

Ended up aborting this via Ctrl-C as at 10MB/s the benchmark would take a LONG time. 10MB/s is a bit slow. In fact, that’s helluva slow. 10MB writes are actually quite pathetic.
Let’s try to step things up a bit and include all the drives attached.

Config: 10 Groups, 2 Drive Mirros = 20 Drives on SAS6IR and H200 Combined.
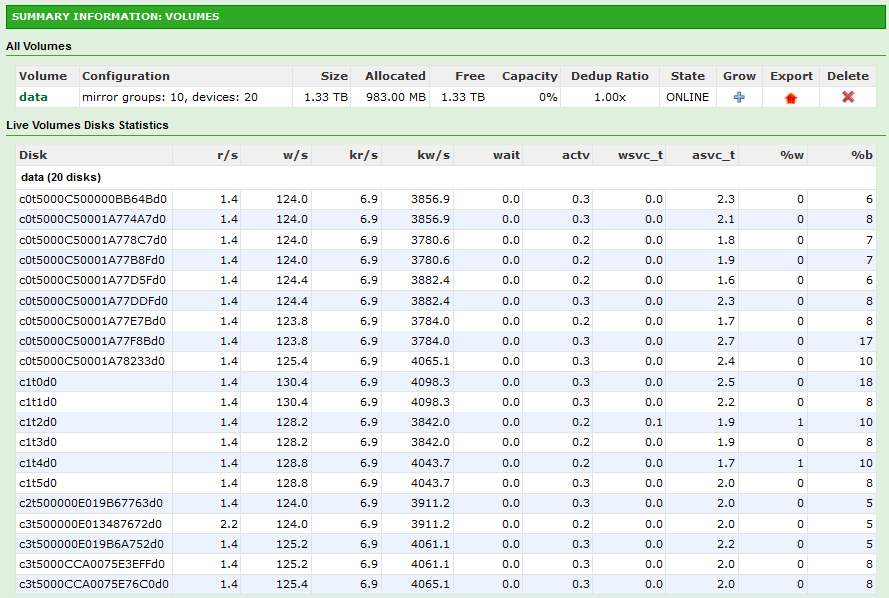
> dd if=/dev/zero of=ddfile1 bs=16k count=3M
^C79104+0 records in
79104+0 records out
1296039936 bytes (1.3 GB) copied, 72.4045 seconds, 17.9 MB/s

Wow 18MB/s. I got USB drives that write faster than this.

Ugh. Without a SLOG (or ZIL), performance is going to be crap. NexentaStor is basically waiting on each drive to confirm commitment to disk before attempting to write the next block. Great for data integrity, terrible for performance.

Let’s disable Sync and try again. This time again with only 6 drives.

> dd if=/dev/zero of=ddfile1 bs=16k count=3M
^C1185778+0 records in
1185778+0 records out
19427786752 bytes (19 GB) copied, 63.966 seconds, 304 MB/s

That’s what I’m talking about! Now let’s try it with all the drives.

> dd if=/dev/zero of=ddfile1 bs=16k count=3M
^C1713095+0 records in
1713094+0 records out
28067332096 bytes (28 GB) copied, 68.8867 seconds, 407 MB/s

Success!

Now, a little warning about disabling Sync. Unless the server is on permanent power (UPS, backup genny), disabling is Sync is downright dangerous for your data. A sudden power failure guarantees loss or corruption of uncommitted data. In my case, with my custom built UPS system, I have guaranteed 4 hours of uptime which is plenty of time to commit any writes to disk and gracefully shutdown all servers.

A quick read test

> dd if=ddfile1 of=/dev/null bs=16k
1713094+0 records in
1713094+0 records out
28067332096 bytes (28 GB) copied, 25.3297 seconds, 1.1 GB/s

Whoa! In this case NexentaStor uses BOTH drives in a mirror for reads. Results in INSANE read speeds.

Update: I realized during the benchmarks that one drive was being utilized 90% while others were hovering around 60%. Replacing the drive and resilvering the array yielded absolutely unbelievable numbers.

> dd if=/dev/zero of=ddfile1 bs=16k count=3M
3145728+0 records in
3145728+0 records out
51539607552 bytes (52 GB) copied, 85.7514 seconds, 601 MB/s

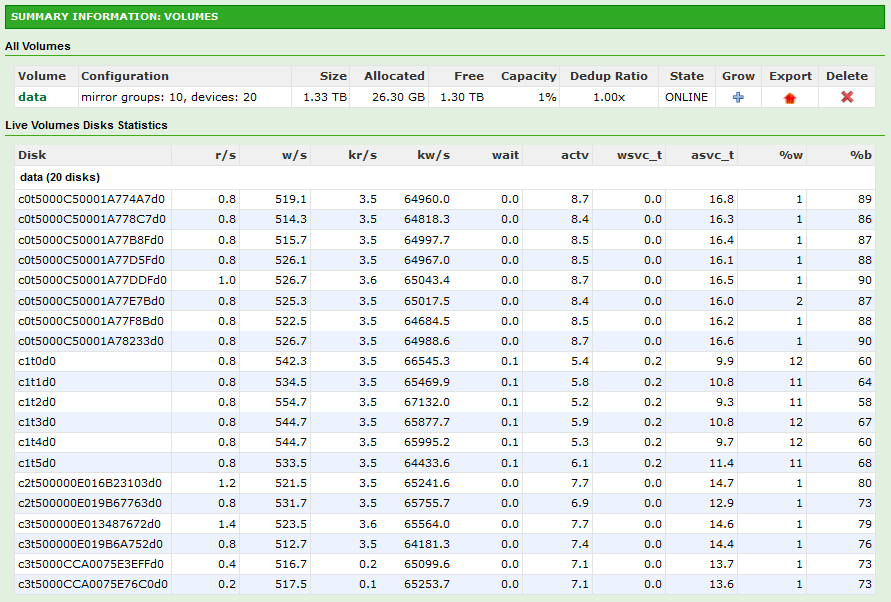
And a quick read test.

> dd if=ddfile1 of=/dev/null bs=16k
3145728+0 records in
3145728+0 records out
51539607552 bytes (52 GB) copied, 46.07 seconds, 1.1 GB/s

Am I impressed? Hell yeah. One thing is for certain. the NICs are definitely going to be the bottleneck. Even with 4 way Active/Active MPIO. I’m going to have to start thinking about moving to 10Gb network next year. What good is all that speed if I’m bottlenecked at the NIC.
NexentaStor Server – Part 2 – Configuration

To complete the installation of NexentaStor the system reboots and presents a registration screen with a unique Machine ID. A quick trip to
http://www.nexenta.com/corp/downloads/register-community-download returns an email with the activation code.

The console wizard the proceeds with setting up the management network interface. In this case I select the bnx0 interface that corresponds to the management link I set up earlier.

bnx0 IP Address: 192.168.77.23
bnx0 netmask: 255.255.255.0
bnx0 mtu: 1496 Error.

No worries. There’s a known fix for that. Let’s just skip for now.

Name Server #1: 192.168.77.201
Name Server #2: 192.168.77.202
Name Server #3:
Gateway IP address: 192.168.77.1

Once Nexenta completes internal configuration. Log into the console

username: root
password: nexenta

# setup network interface bnx0 static
bnx0 IP Address: 192.168.77.23
bnx0 netmask: 255.255.255.0
bnx0 mtu: 8982
Warning: changing mtu MAY require driver re-load! Network Interface(s) could be re-initialized.
Change MTU from the current 1496 to 8982 ?  (y/n) y

# setup network interface bnx0 static
bnx0 IP Address: 192.168.77.23
bnx0 netmask: 255.255.255.0
bnx0 mtu: 1500
Warning: changing mtu MAY require driver re-load! Network Interface(s) could be re-initialized.
Change MTU from the current 8982 to 1500 ?  (y/n) y

# ping www.google.ca
www.google.ca is alive

Yay. Server is online. While at it, might as well check for any updates.

# setup appliance upgrade
Checking repository sources. Please wait...
No new upgrades/packages available.

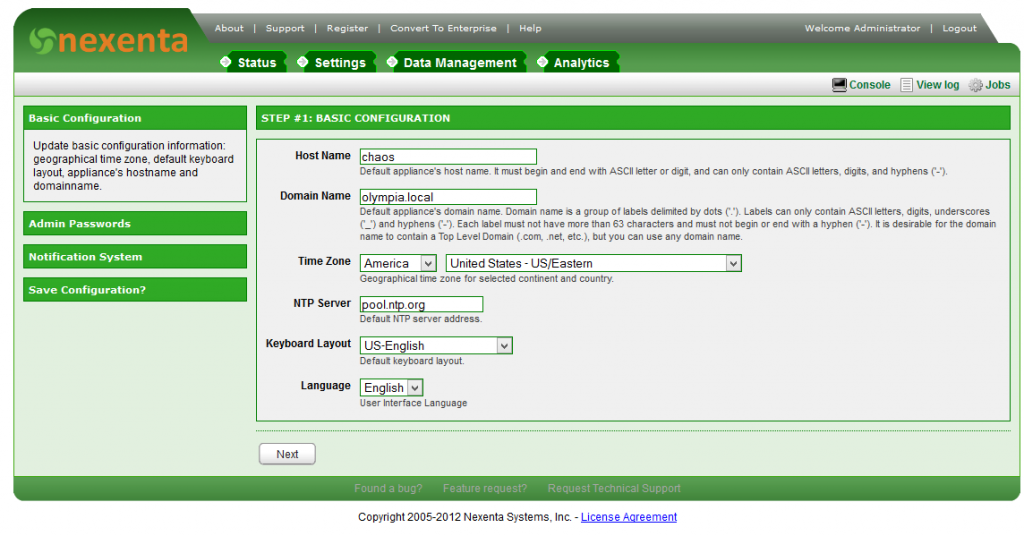
Now to go back to the Web UI to complete the configuration of the filer.

Ran into an issue configuring the Jumbo Frames on the Intel PRO/1000 VT card.
For whatever reason NexentaStor will only allow ports 3 and 4 (igb2/igb3) to bet set to jumbo frames (9K). Attempting to set igb0/igb1 port to Jumbo Frames will result in error:
SystemCallError: failed to configure igb0 with ip 192.168.91.1 netmask 255.255.255.0 mtu 9000 broadcast + up: ifconfig: setifmtu: SIOCSLIFMTU: igb0: Invalid argument
This of course doesn’t make sense since Intel Pro cards are on Nexenta’s HCL. To fix this, gotta get into the guts of the OS. In Console or through SSH:

# option expert_mode="1" -s
# !bash
You are about to enter the Unix ("raw") shell and execute low-level Unix command(s). Warning: using low-level Unix commands is not recommended! Execute? Yes

Now the actual solaris shell is enabled and all commands can be accessed. From here I need to disconnect the igb0/igb1 interfaces

# dladm show-phys
LINK MEDIA STATE SPEED DUPLEX DEVICE
bnx2 Ethernet down 0 half bnx2
igb2 Ethernet up 1000 full igb2
bnx0 Ethernet up 1000 full bnx0
igb0 Ethernet up 1000 full igb0
bnx1 Ethernet down 0 half bnx1
bnx3 Ethernet down 0 half bnx3
igb3 Ethernet up 1000 full igb3
igb1 Ethernet up 1000 full igb1

# dladm show-linkprop -p mtu igb0
LINK PROPERTY PERM VALUE DEFAULT POSSIBLE
igb0 mtu r- 1500 1500 60-9000

Well, that’s interesting. Why can’t we set it then?

# ifconfig igb0 unplumb
# dladm set-linkprop -p mtu=9000 igb0
# ifconfig igb0 plumb 192.168.91.1 up

Now repeat for igb1. Once igb1 has been configured

# exit
Important: To re-sync the appliance's management state information, please
consider running 'setup appliance nms restart' command.

# setup appliance nms restart
Trying to gain exclusive access to the appliance.
This operation may take up to 30 seconds to complete. Please wait...
Exclusive access granted.
This operation will make Nexenta Management Server temporarily unavailable. Proceed? Yes
Restarting NMS. Please wait...

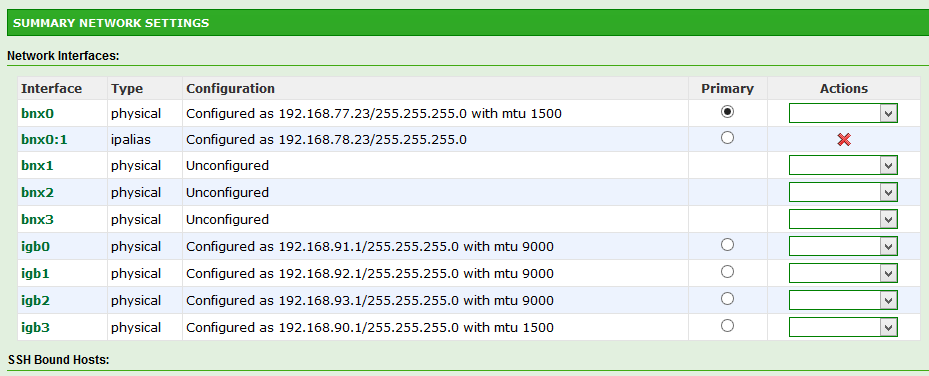
Now to go back to the web interface and configure the IP. Not sure why this needs to be done again. But it works fine this time.

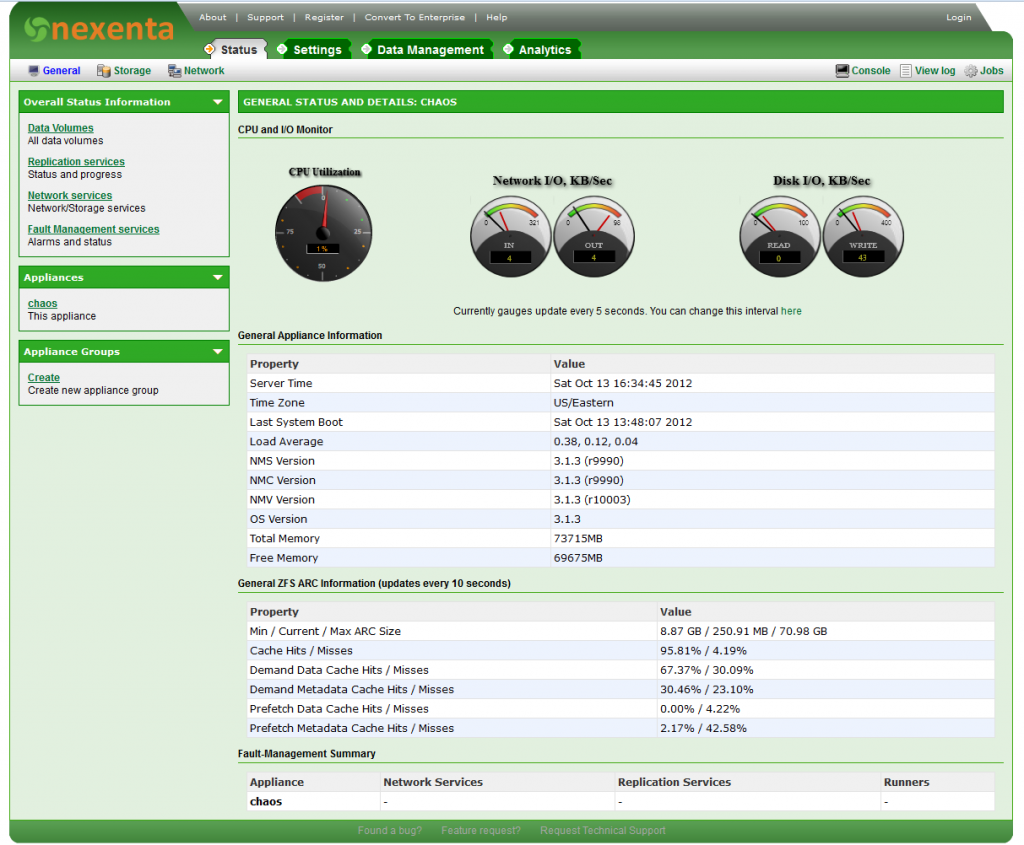
Once the rest of the wizard is completed the status screen shows the current configuration.


In Part 3 I’ll be doing some benchmarks…

NexentaStor Server – Part 1 – The Build

Overview

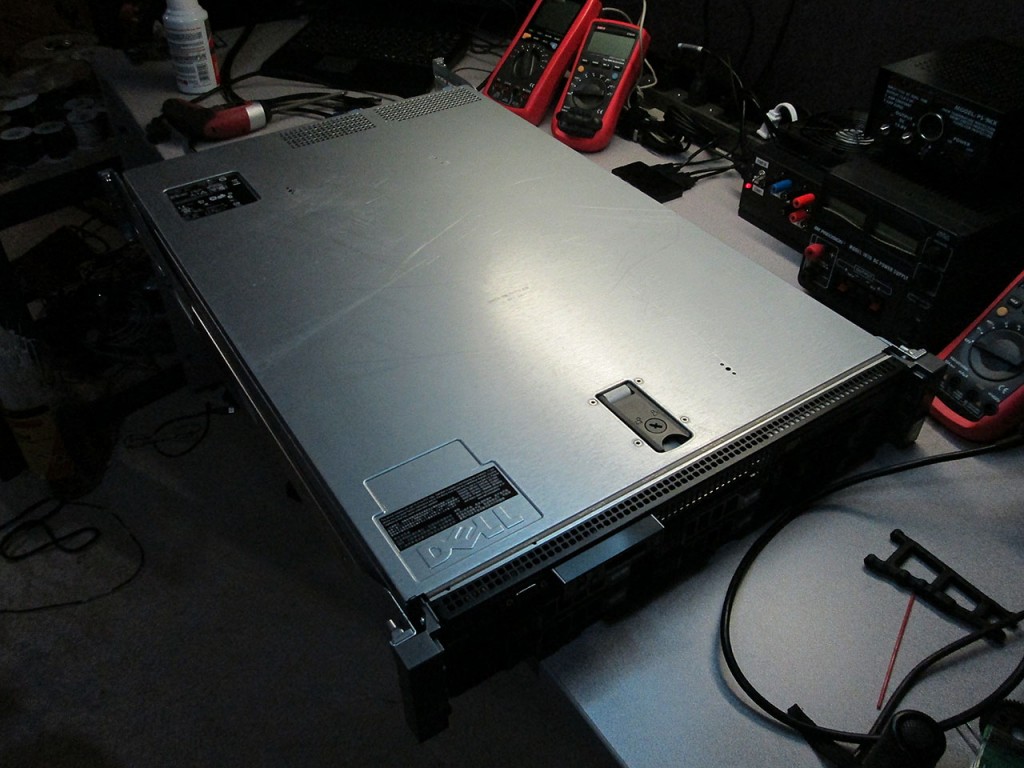
A while back I picked up an HP DL160 G6 to replacing my aging Dell PowerEdge 2950 II as my NexentaStor server. The end result was less than perfect and I was never happy with the performance of the server. I was seeing performance decrease over the old PE2950II and the two on-board NIC’s were not sufficient to feed all the servers and workstations with data. So I decide to scrap it and rebuild from scratch. With that in mind, I picked up yet another Dell PowerEdge R710 from Kijiji.

This R710 one comes with two X5550 2.6Ghz Quad Core CPU’s and 96GB of RAM. I’ll pilfer some of that RAM as it comes with 8GB sticks and put it to good use elsewhere. Replace the 8GB sticks with 4GB that I have abundance of for a total of 72GB of RAM.