Install Instructions for 2008-2010 Dodge Challenger
As part of my quest for no wheel hop and good 1/4 times I pulled the trigger on the N2MB 2-Step WOT Box.
The web site does not have Challenger specific instructions so I’m posting my install here.
I installed the WOT Box behind the Climate Controls
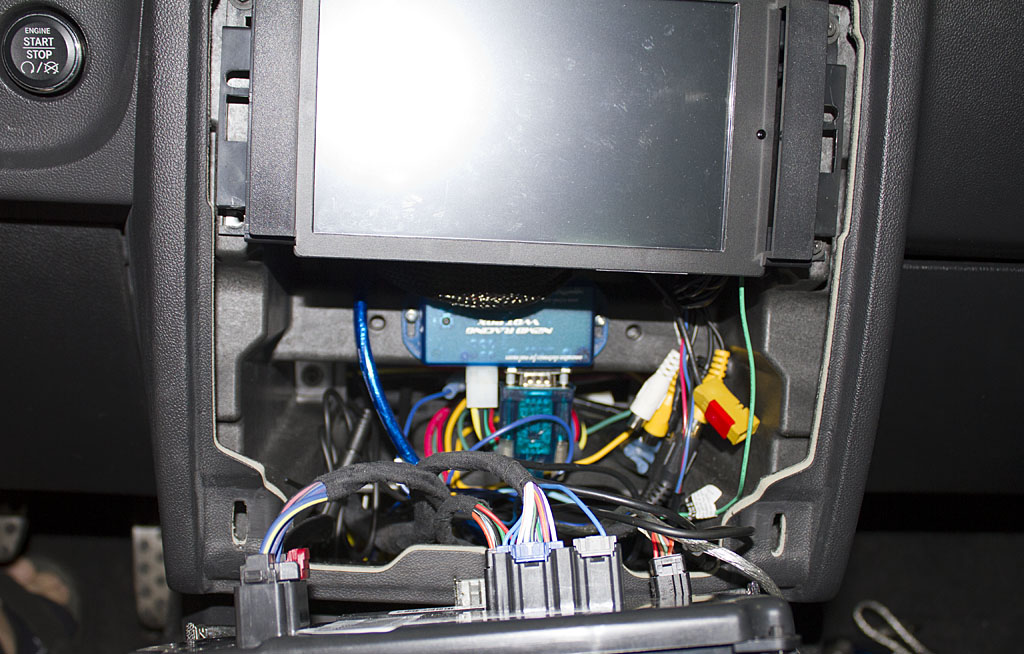
Grounded the WOT Box (black 18 AWG) to an amplifier screw under the steering wheel.
Ran the rest of the wires through the grommet hole in the firewall.
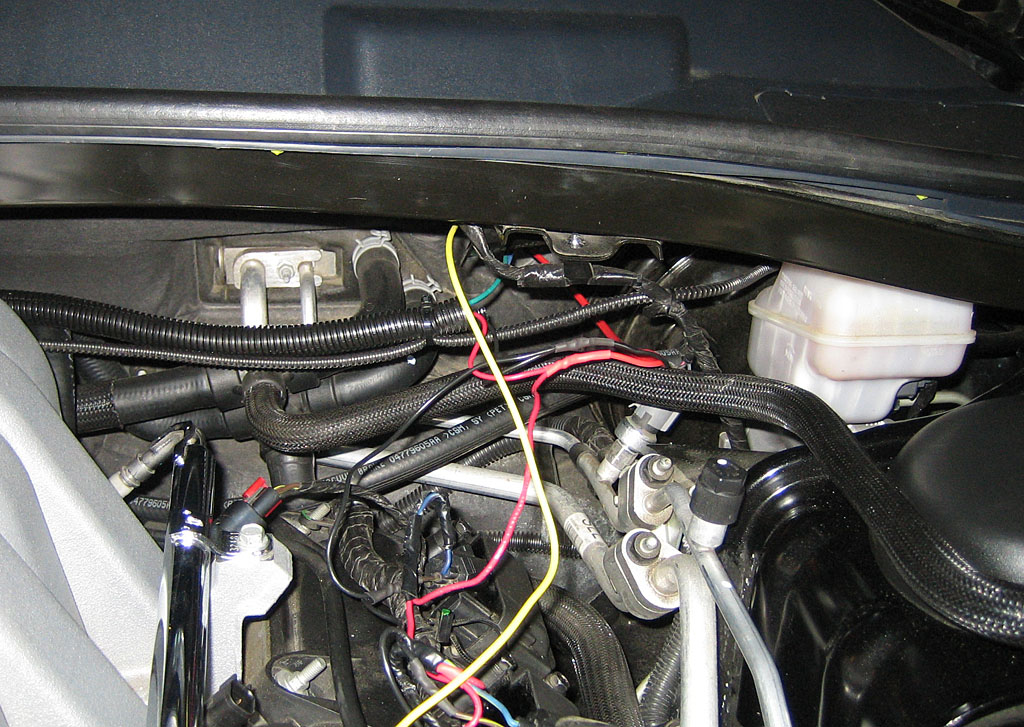
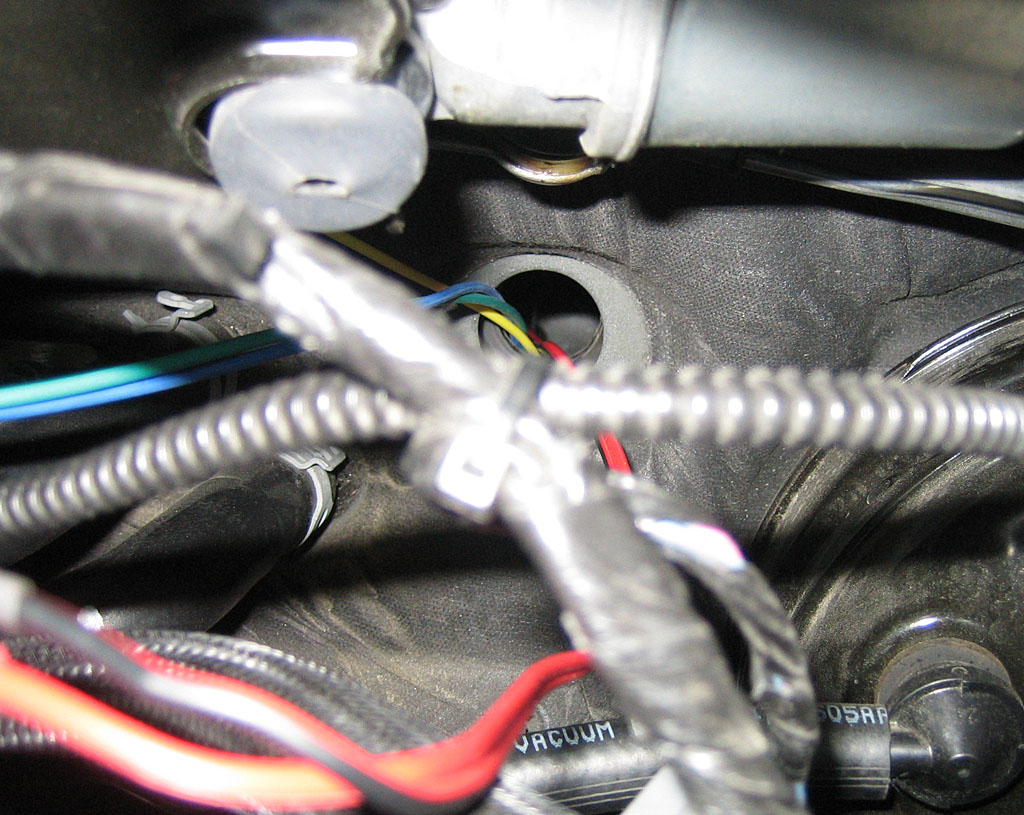
Now, the Blue (WOT Sense) and Green (Clutch UpStop) run alongside the firewall to the PCM. The PCM is located on the passenger side of the vehicle under a plastic cover.
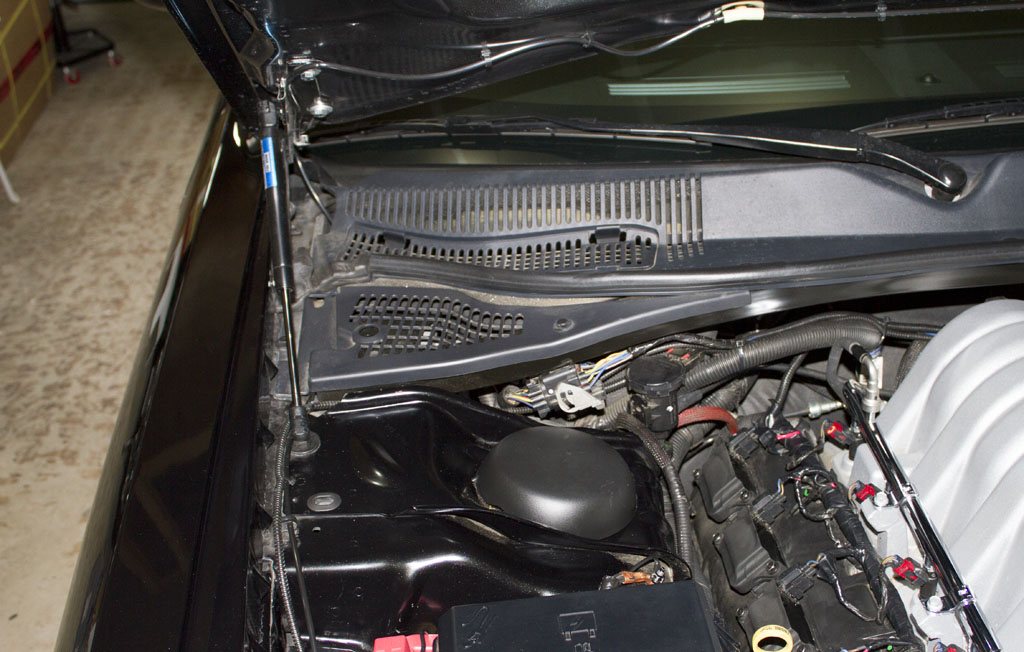
To remove the cover pull out the two plastic rivets using a tree puller. This will expose the PCM
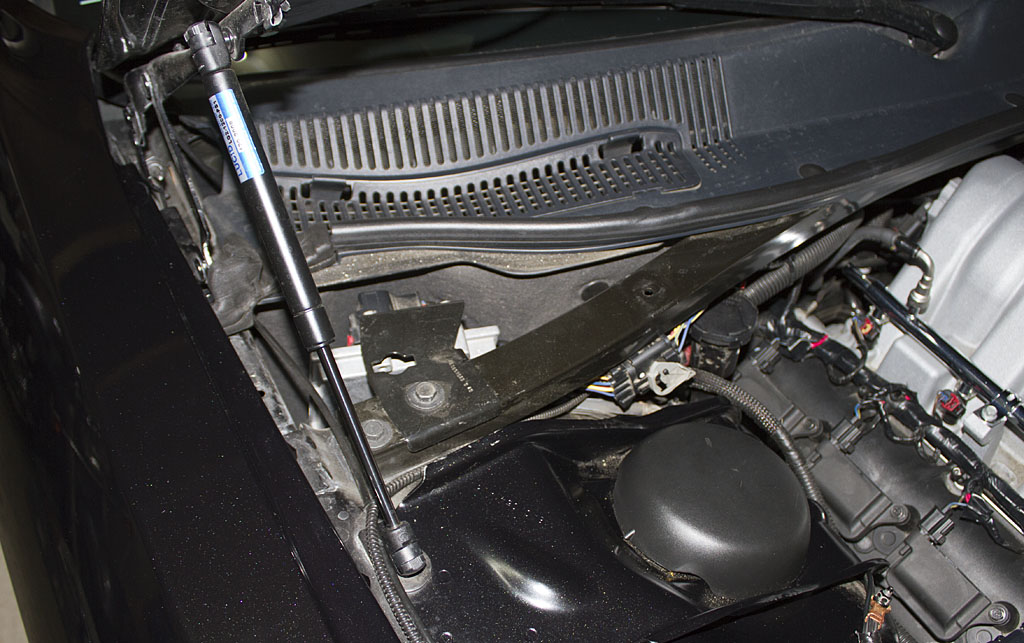
Use a 13mm socket to unscrew the single screw that holds the PCM in place and pull it out.
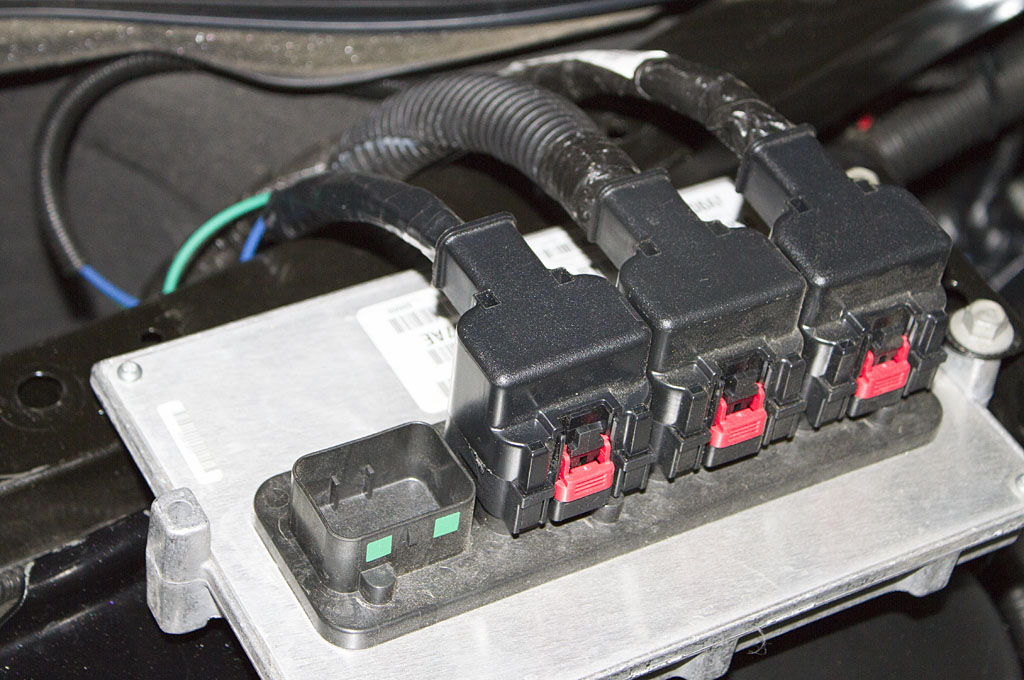
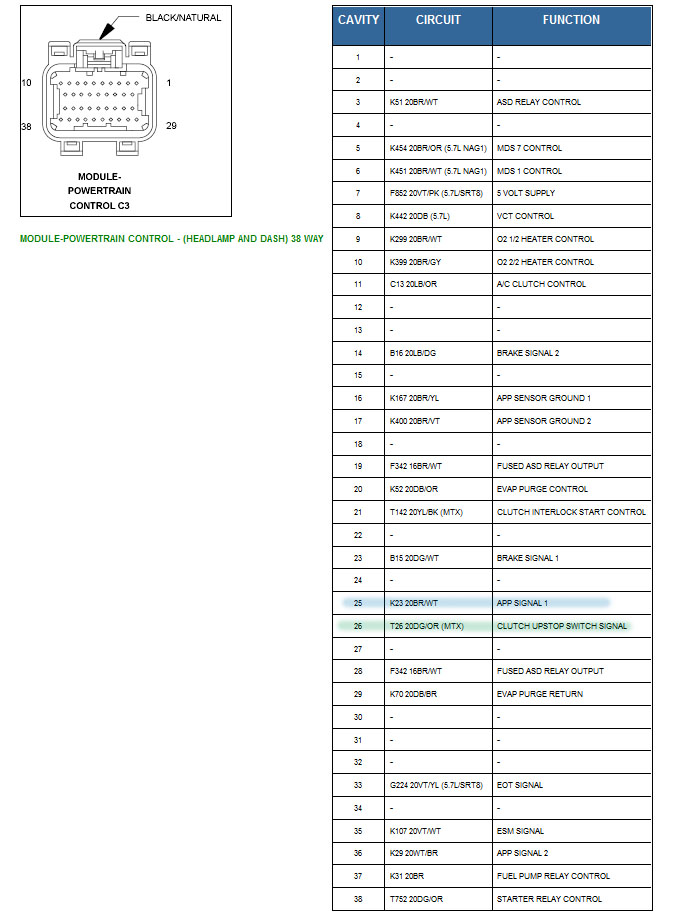
Disconnect the C3 Connector by pushing out the red lock tab and squeezing the black tab underneath.
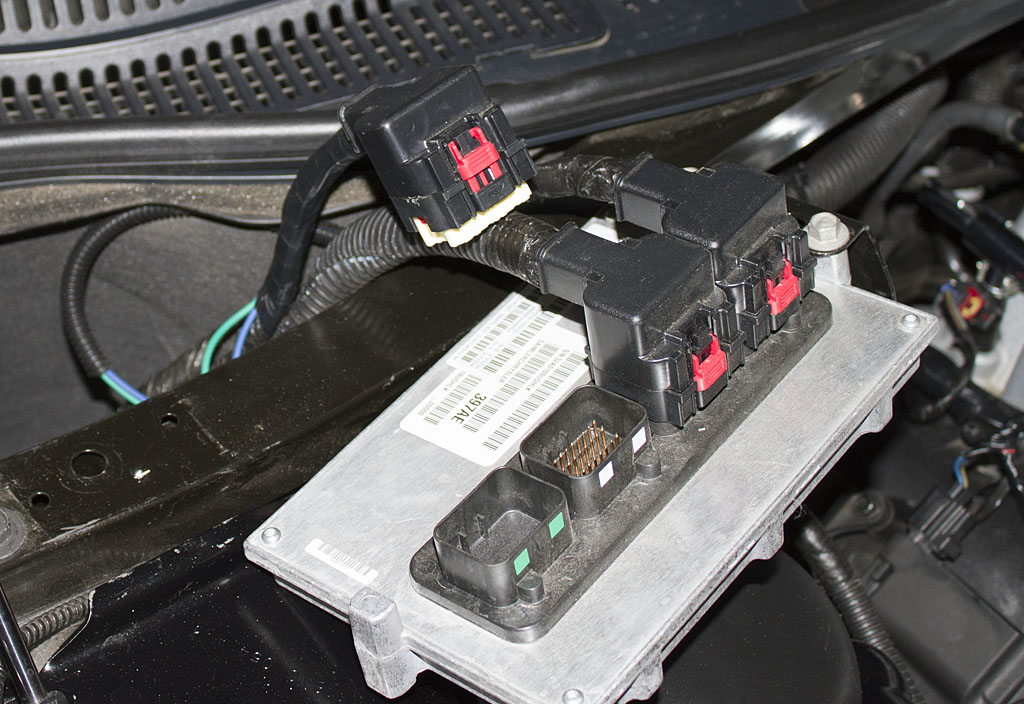
The C3 Connector has both signals we need on pin 25 (APP) and 26 (Clutch)
Now splice in the Green and Blue wires into the respective wires.
Check out www2: soldering for the recommended soldering technique.
NOTE: There are several wires with exact same color coding so MAKE SURE you’re splicing into the right wires. I ended up taking the plug apart to confirm the wires.
Once that is done, tape and seal everything with electrical tape and reassemble. The hard part is done. Now for the time-consuming part.
Modifying the Coil Wiring
This is a simple diagram of the Ignition wiring (Coil Packs and Injectors)
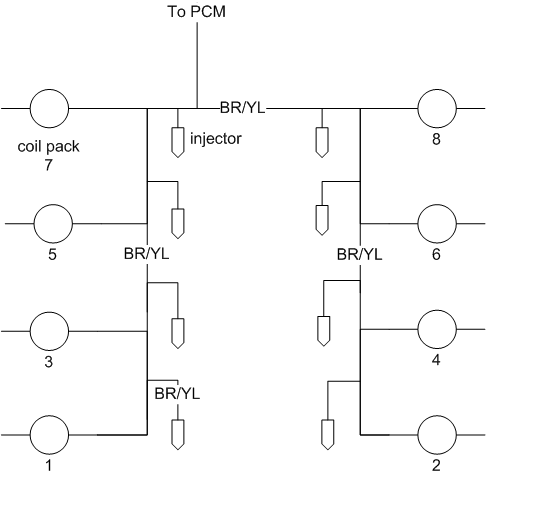
Our ignition system uses a Brown/Yellow common positive wire. We need to iterrupt the signal to the coils but leave the injectors still firing (this is especially important because we’ll be using one of the injectors to get RPM pickup)
This is a simple diagram of the final wiring
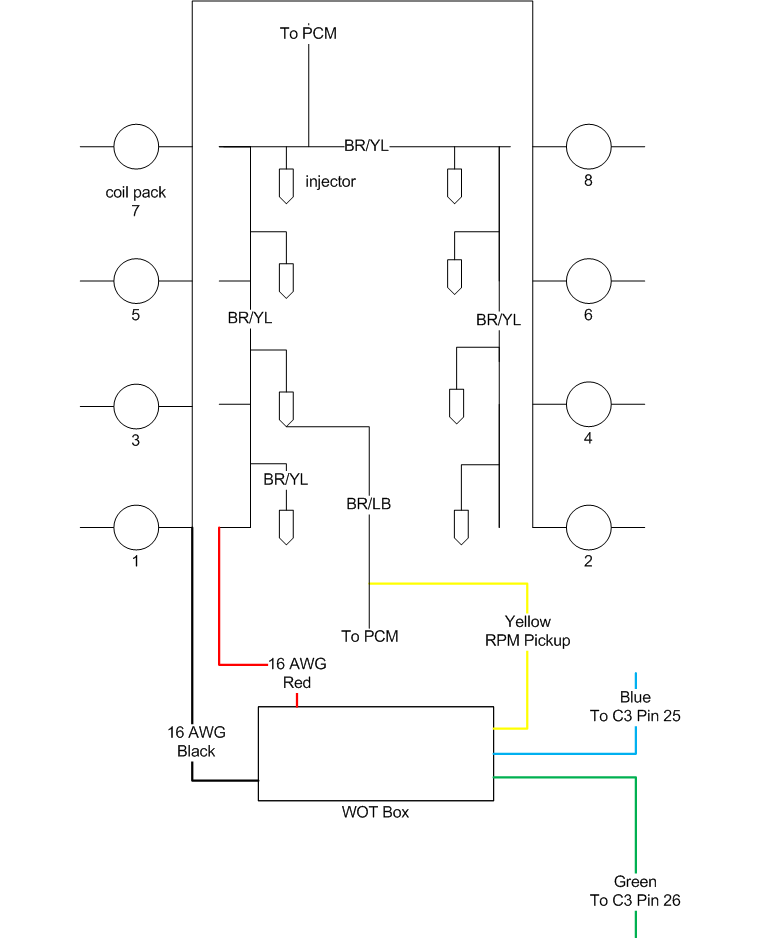
You need to cut the brown/yellow wire going into each pack and splice the black wire going into the pack and the red wire going away from the coil.
Splice the Yellow wire from the WOT box into any injector control wire (the NON-Common wire). I used injector #3 (Brown/Light Blue) wire. Do not cut the wire, just tap into it.
This is a very time consuming process but if you take your time and solder, heat-shrink and electrically tape everything, It’ll look pretty much stock. I’ve used wire loom to add additional insulation and to make it look cleaner.
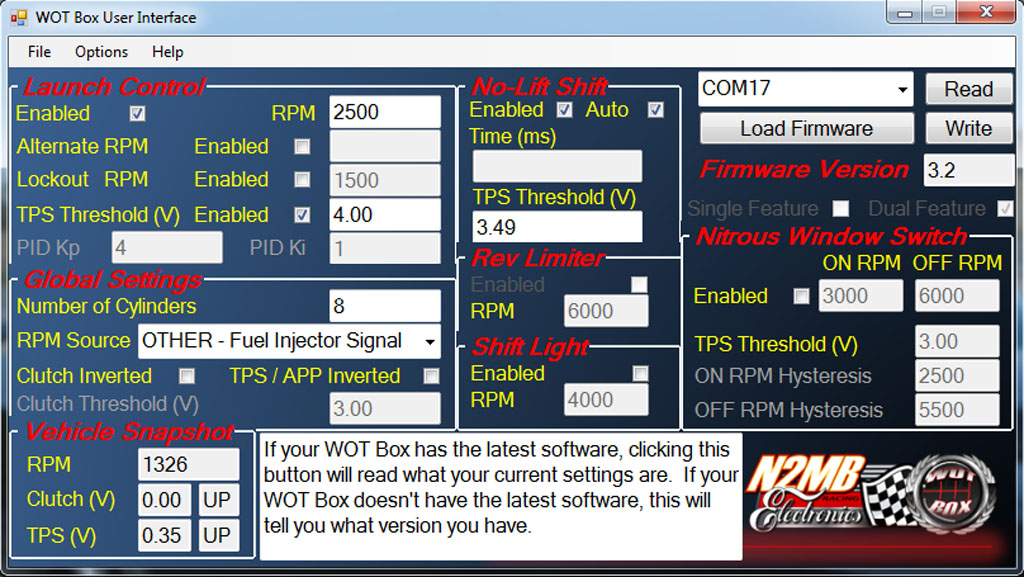
To program the software. I used the following settings:
NOTE: You must have the engine running in order for the WOT box to be operational. You will not be able to program it otherwise. Having ignition on is not sufficient.
NOTE: When using the WOT Box launch control setting, you might get CEL codes. It’s normal and will not affect normal operation of the vehicle. If you don’t have a tuner to clear the codes, the light will usually go out after 3-4 “good” trips.
Wot Box in Operation