New Web Site

Been spending some free time lately learning some new technologies and improving my knowledge of others.

End result: http://www.jubjoo.com

jubjoo

Implemented with C# 2012, ASP.Net, SQL 2012. Using .Net Framework 4.5, Entity Framework 5.0, WCF. Latest Telerik for Ajax release. Extensive use of Linq (Linq2Sql), Lambda expressions.
In-Memory image manipulation. Video decoding/encoding. SEO Optimization using URL Routing (no more URL Rewriter, Woo!).

The site is built for easy load balancing and scalability. Currently split into 4 servers (Front End Web, SQL, Media Storage and Web Server, and Worker (Video Encoding, DB Writes, Image scaling and branding).

This is typically how I keep up to date with latest tech. Rather than spending time going over books, I build these projects utilizing the actual technologies. I still spend a lot of time reading documentation but I find this a lot more fun and engaging.

I should note that I’m not a web designer. Hence the minimalistic approach to the site design. I can develop anything in code but it’ll just not look very good.

Teensy + USB Raw HID + C# = Eureka!

I’ve spent at least 3 days converting my Amp Delay Service from Serial communication to Raw HID communication protocol. My CarPC was using at one point 5 COM ports for the various devices connected to it. Iw was becoming a real pain keeping track of each COM port and the actual device that it represents. So I decided to convert my devices to plain USB devices rather than Serial.

Everything was going great until I tried sending data to Teensy while converting the Amp Delay box. The Amp Delay service needs to ping the Teensy device but for some reason (which is still unknown to me) sending data to the Emulated Serial device doesn’t work.

I’ve tried a handful of 3rd party USB libraries, tried rolling my own, tried synchronous vs overlapped IO. Nothing worked. I just could not send data to the device.

After hours of Googling, I finally stumbled on a solution. Turns out that when Teensy operates in Raw HID mode it presents itself to the PC as two devices:

VID_16C0&PID_0486&MI_00 – Raw HID Device
VID_16C0&PID_0486&MI_01 – Emulated Serial device

The “Serial” object in Arduino can send data to the Emulated Serial device which is the method I used to send the Gauge Pod Sender data to the PC. There seems to be a problem however sending data from the host to the device over this protocol.

The correct solution was:

1. Connect to the RAW HID Device instead.
2. Use RawHID.send and RawHID.read in Arduino code to communicate with the host.

I completely accidentally stumbled upon the RawHID object. It is not documented ANYWHERE. The difference is that Serial.print sends data to the Emulated Serial device and RawHID.send sends it to the RAW HID device.


void SendHID(String text) 
{
 
  uint8_t sendMessage[64]; //buffer
  text.getBytes(sendMessage, text.length()+1); //convert text to bytes

  //fill rest of buffer with zero
  for (int idx = text.length(); idx < 64; idx++)
    sendMessage[idx] = 0;
    
//send to PC, allow 100ms for sending the frame
  int sent = RawHID.send(sendMessage, 100);

}

Another interesting tidbit.

arduino-1.0.3\hardware\teensy\cores\usb_rawhid\usb_private.h

holds the VendorID and ProductID that can be changed. When the sketch is uploaded to the device the values are changed on it. This makes it easy to distinguish multiple Teensy devices on the same PC. By changing the Product ID I can have the Amp Delay box and the Gauge Pod sender uniquely identified and don't have to worry about the program connecting to the wrong box.

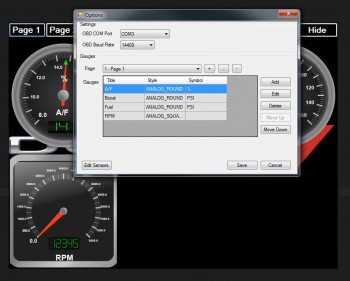
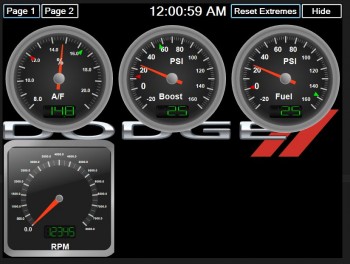
Gauge Pod 2.0 Development

Been busy coding away on the Gauge Pod software. It’s coming along nicely. I’ve taken a slightly different approach from the first version and the code is turning out to be a lot simpler. Still using layered architecture to separate Sensors, Gauges, Communication and UI but I changed how the layers interact with each other. The update performance has gone up dramatically. Using the Gauge Pod Sender in USB mode has also greatly reduced overhead and feeds data incredibly fast.

I’m currently in the testing phase of the software but looking good so far. The gauges are VERY stable compared to the last version. Will start testing the software on the car in the next few weeks as time permits. Can’t wait to try this in the car.

Gauge Pod 2.0 – Sender (pt 2)

I’ve spent about 2 days on dealing with the ADC (Analog to Digital Converter) of the Arduino platform. Turns out there’s more problems to overcome when dealing with taking analog signal from a sensor and converting it to meaningful digital reading.

The issue is that even with a constant input voltage the ADC reading sampling error rate is larger than I’d like (~1.2%) with some random spikes in excess of 3%.

I built a test rig to troubleshoot the issue. Using constant input voltage and a potentiometer to simulate the analog input from a sensor.
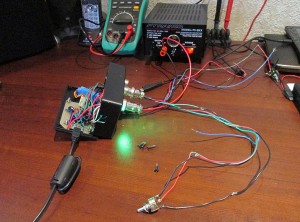
Goal:

– At least 4 sample updates per second. (Smooth gauge updates)
– Stable voltage regardless of outside interference.

Things I found:
– Arduino Atmel chip uses a single ADC and multiplexes the input pins.
– Switching read pin on the ADC causes noise in the system. Solution to read the first value and totally discard it. Then wait at least 10ms before sampling actual data.
– Sample accuracy is inversely proportional to the delay between samples. Shorter delay between reads, less drift. But over a static period of time, the error rate is the same.
– ADC is quite sensitive to electronic noise. Adjacent pins seem to affect reading.

Things I tried:

– Average voltage over multiple samples (currently 11 samples per read)
– Add delay between readings (1 to 12 ms) (currently 2ms)
– Discard top and bottom values and average the rest (currently discard 25%)
– Add a delta value, discard new value if difference is less than delta (currently 0.011V)
– vary delay on multiplex debounce (currently 10ms)

Current sampling rate: 3.7 samples / second.

Final Arduino Code:

const int LED_RED = 9;
const int LED_GREEN = 8;
const int LED_BLUE = 7;
const int LED_ACT = 11;
const int INPUT_REF = 22;
const int INPUT_RATE = 20;

int refPins[4] = {19, 17, 18, 16};
int sensePins[4] = {15, 13, 14, 12};
double lastRefVolts[4] = { 0, 0, 0, 0 };
double lastSenseVolts[4] = { 0, 0, 0, 0 };

const float LOW_VOLTAGE = 4.5; //alert voltage for 5V bus

const int MAX_SAMPLES = 50; //max sample on trim pot
const float DISCARD_PCT = 0.25; //percent of samples to discard (top and bottom)
const float MAX_DELTA = 0.011; //ignore changes less than this
const int SAMPLE_DELAY = 2; //delay MS between sample reads
const int INITIAL_DELAY = 10; //delay MS on pin change


void setup()
{
  
  //set pin IO modes
  pinMode(LED_RED, OUTPUT);
  pinMode(LED_GREEN, OUTPUT);
  pinMode(LED_BLUE, OUTPUT);
  pinMode(LED_ACT, OUTPUT);
  
  for (int pin = 0; pin < 4; pin++) 
  {
    pinMode(refPins[pin], INPUT);
    pinMode(sensePins[pin], INPUT);
  }
  
  pinMode(INPUT_REF, INPUT);
  pinMode(INPUT_RATE, INPUT); 
  
  //cycle leds
  digitalWrite(LED_RED, HIGH);
  digitalWrite(LED_BLUE, HIGH);
  digitalWrite(LED_GREEN, HIGH);

  setLED(LOW, HIGH, HIGH);
  delay(200);
  setLED(HIGH, LOW, HIGH);
  delay(200);
  setLED(HIGH, HIGH, LOW);
  delay(200);
  setLED(LOW, LOW, LOW);
  delay(200);
  setLED(HIGH, HIGH, HIGH);

  //emulated serial, speed ignored  
  Serial.begin(38400);
  
}

void loop()
{
    
   //read serial to clear buffer
  if (Serial.available() > 0)
  {
    Serial.flush(); 
  }

  //get number of samples to read
  int readCount = getReadCount();

  //write +5V bus voltage
  writeRefVoltage(readCount);

  //write all input sensors
  for (int pin = 0; pin < 4; pin++) {
    writeSerialVoltage(pin, readCount);
  }
  
}

void writeSerialVoltage(int pin, int readCount) 
{

  digitalWrite(LED_BLUE, HIGH); //blue off - start sending
  digitalWrite(LED_ACT, LOW); //internal off
    
  //ref volt, seems more volatile
  float refVolt = getVoltage(refPins[pin], readCount);
  float newRefVolt = processRefVoltage(pin, refVolt);

  //get sensor voltage
  float senseVolt = getVoltage(sensePins[pin], readCount);
  float newSenseVolt = processSenseVoltage(pin, senseVolt);


  Serial.print("IN");  //write identifier
  Serial.print(pin);
  Serial.print("\t");
  Serial.print(newRefVolt, 4); 
  Serial.print("\t");
  Serial.print(newSenseVolt, 4);
  Serial.print("\r");
  Serial.println("");
  
  digitalWrite(LED_ACT, HIGH); //internal on
  digitalWrite(LED_BLUE, LOW); //blue on - sending done

}

//do a delta comparison on Ref voltage
float processRefVoltage(int Pin, float refVolt) 
{
  
  float lastRefVolt = lastRefVolts[Pin];

   if (abs(refVolt - lastRefVolt) < MAX_DELTA)
     refVolt = lastRefVolts[Pin];
   else
     lastRefVolts[Pin] = refVolt;  
    
    return refVolt;

}

//do delta comparison on sensor voltage
float processSenseVoltage(int Pin, float senseVolt) 
{
  
  float lastSenseVolt = lastSenseVolts[Pin];

   if (abs(senseVolt - lastSenseVolt) < MAX_DELTA)
      senseVolt = lastSenseVolts[Pin];
  else 
     lastSenseVolts[Pin] = senseVolt;
    
    return senseVolt;
}


//send bus voltage to host
void writeRefVoltage(int readCount) {
  
  float refVoltage = getVoltage(INPUT_REF, readCount);
  
  if (refVoltage < LOW_VOLTAGE) 
  {
    digitalWrite(LED_RED, LOW);
    digitalWrite(LED_GREEN, HIGH);
  }
  else
  {
    digitalWrite(LED_RED, HIGH);
    digitalWrite(LED_GREEN, LOW);
  }
    
  Serial.print("REF\t");
  Serial.print(refVoltage, 4);
  Serial.println("");
}

//read value from ADC (0-1023) and convert to voltage (0-5)
float getVoltage(int PIN, int samples) {
  
  //allow ADC to stablize
  analogRead(PIN); //ignore value
  delay(INITIAL_DELAY); //wait for debounce
  
  float sampleList[samples]; 

  //read samples
  for (int i = 0; i < samples; i++) 
  {
    float voltage = (float)analogRead(PIN) * (5.0 / 1024.0);
    //round to 2 decimals
    sampleList[i] = (ceil(voltage * 100.0)) / 100.0;
    delay(SAMPLE_DELAY);
  }
  
   //sort array (shitty bubble sort, cause i'm lazy)
    float swapper;
    for (int o = samples-1; o > 0; o--) {
        for (int i = 1; i <= o; i++) {
          if (sampleList[i-1] > sampleList[i]) {
          swapper = sampleList[i-1];
          sampleList [i-1] = sampleList[i];
          sampleList[i] = swapper;
        }
      }
    }
      
      //discard % of top and bottom values, average the rest
      int avgStart = max(samples * DISCARD_PCT, 1); //array start
      int avgEnd = min(samples * (1.0 - DISCARD_PCT), samples); //array end
      
      int avgSamples = 0;
      float ret = 0;
      
      //average out the values
      for (int cntr = avgStart; cntr < avgEnd; cntr++) 
      {
        avgSamples++;
        ret += sampleList[cntr];
      }
     
      return ret / (float)avgSamples;
}

//read trim pot, get average samples
int getReadCount() {
 
  analogRead(INPUT_RATE);
  int readCount = analogRead(INPUT_RATE);
  return map(readCount, 0, 1023, 4, MAX_SAMPLES);
  
}


//set RGB led values
void setLED(int RED, int GREEN, int BLUE) {
digitalWrite(LED_RED, RED);
digitalWrite(LED_GREEN, GREEN);
digitalWrite(LED_BLUE, BLUE);
}

Binary sketch size: 7,196 bytes (of a 32,256 byte maximum)
Estimated memory use: 103 bytes (of a 2,560 byte maximum)

This is probably as close as I can get to get an accurate reading that doesn't jump around too much. Filters most noise while giving a decent sample rate. Currently reading all 4 inputs. Technically could reduce to 3 inputs since 4th won't be used for a while. Will see how well Gauge Pod software deals with current feed rate.
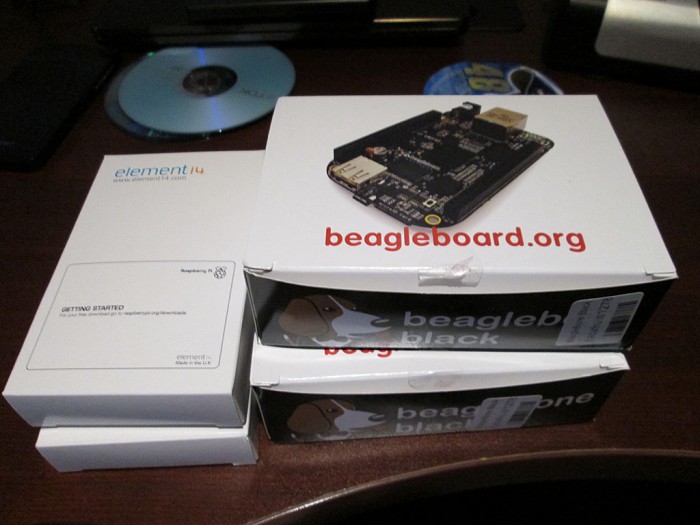
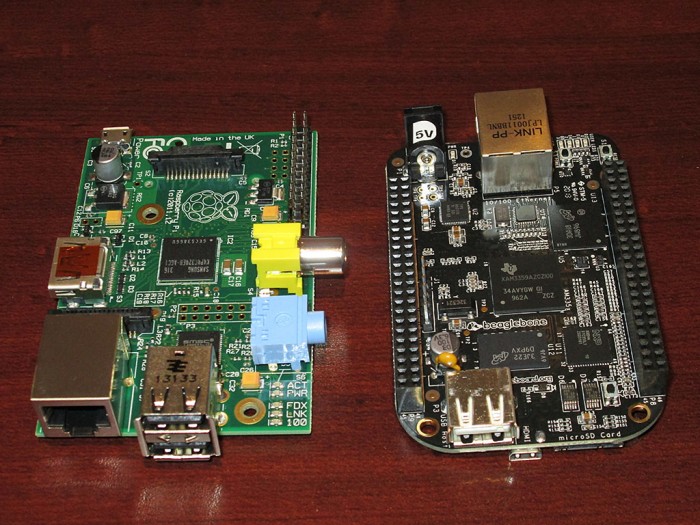
GaugePod – Rev 2

I’ve been spending a lot of time lately thinking about how to best redo my GaugePod program for my Carputer project.

Existing Problems (and potential solutions):

Program sometimes crashes on resume from hibernate.
Need to determine what causes this. This started when upgraded from Atom to I3 Motherboard/CPU. Perhaps Mobo not sending proper signal to Windows?

Current Arduino implementation isn’t very accurate.
This one is major. Had to fudge the voltage numbers to get semi-accurate reading. This needs a rewrite. Right now the Arduino box simply sends the raw value from the ADC (0 to 1023) as input into GaugePod. Perhaps a better solution would be to have the Arduino send the actual voltage. In fact, I could monitor the reference voltage to make sure it doesn’t drop below 5V. Arduino could detect any drop in reference voltage and adjust reading before sending to the Carputer. Could even add an LED to indicate a condition where reference voltage is not 5V, though it wouldn’t know if input voltage is >5V. Though that is highly unlikely as the reference voltage is coming from a 5V voltage regulator.

Change how GaugePod stores settings locally.
Right now the settings are stored in a DataSet that’s stored in the user profile. Can’t migrate settings or even hand edit. Need the ability to import/export settings. Switch to XML Format. Will have to write a custom library to deal with this. Won’t be difficult. Already did this kind of implementation in the UltraDMM project.

The Arduino box is too big and wiring too complex.
Need to simplify wiring, switch to Teensy for smaller footprint. Perhaps add chokes to eliminate electronics noise. Rev 2.0 of the Arduino box uses Molex connectors for the sensors.
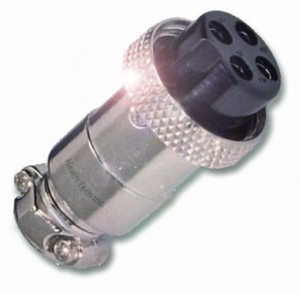
Better to use barrel connectors. Need 3 Pins.
1 – 5V Input
2 – Ground
3 – Sensor Return
Something like this would work:

Additional advantage of using round connectors. Easy enough to drill holes for them rather then cut square holes for the Molex connectors. The enclosure would be nicer looking. The screw-in connectors would deal better with vibration in the car.

Program runs in foreground, blocks access to Centrifuse
Possible solution to implement as plugin for Centrifuse. Though it might be possible to simply run the program inside a Centrafuse window. I vaguely remember reading that this can be done. Drawback of this approach is reduced screen real-estate.

To Be Continued…..

Build ffmpeg under Centos 6 x64

Installing ffmpeg under CentOS with all the plugins enabled is no easy task apparently. The only way to get it working properly is to build it from scratch. This process was compiled from lists and forums on the internet

Add DAG Repo to your Yum Repo list if it’s not already added. Run Update to make sure everything is in sync.

rpm -Uhv http://packages.sw.be/rpmforge-release/rpmforge-release-0.5.2-2.el6.rf.x86_64.rpm
yum -y update

Install all tools and libs necessary to build

yum install SDL-devel a52dec a52dec-devel alsa-lib-devel faac faac-devel faad2 faad2-devel
yum install freetype-devel giflib gsm gsm-devel imlib2 imlib2-devel lame lame-devel libICE-devel libSM-devel libX11-devel
yum install libXau-devel libXdmcp-devel libXext-devel libXrandr-devel libXrender-devel libXt-devel
yum install id3tag-devel libogg libvorbis vorbis-tools mesa-libGL-devel mesa-libGLU-devel xorg-x11-proto-devel 
yum install xvidcore xvidcore-devel zlib-devel amrnb-devel amrwb-devel
yum install libtheora theora-tools glibc gcc gcc-c++ 
yum install autoconf automake libtool make ncurses-devel
yum install libdc1394 libdc1394-devel yasm nasm
yum install libvpx*
yum install git-core opencore-amr-devel

Install Codecs

cd /tmp
wget http://www8.mplayerhq.hu/MPlayer/releases/codecs/all-20110131.tar.bz2
bunzip2 all-20110131.tar.bz2; tar xvf all-20110131.tar
 
mkdir /usr/local/lib/codecs/
mkdir /usr/local/lib64/codecs/
cp all-20110131/* /usr/local/lib/codecs/
cp all-20110131/* /usr/local/lib64/codecs/
chmod -R 755 /usr/local/lib/codecs/
chmod -R 755 /usr/local/lib64/codecs/
cd /tmp
rm -rf all-201110131*
cd /tmp
wget http://downloads.xiph.org/releases/ogg/libogg-1.3.0.tar.gz
tar xzvf libogg-1.3.0.tar.gz
cd libogg-1.3.0
./configure
make
make install
cd /tmp
rm -rf libogg*
cd /tmp
wget http://downloads.xiph.org/releases/vorbis/libvorbis-1.3.3.tar.gz
tar xzvf libvorbis-1.3.3.tar.gz
cd libvorbis-1.3.3
./configure
make
make install
cd /tmp
rm -rf libvorbis*
cd /tmp
wget http://downloads.xiph.org/releases/theora/libtheora-1.1.1.tar.gz
tar xzvf libtheora-1.1.1.tar.gz
cd libtheora-1.1.1
./configure
make
make install
cd /tmp
rm -rf libtheora*
cd /tmp
git clone http://git.chromium.org/webm/libvpx.git
cd libvpx
./configure --enable-shared --extra-cflags=-fPIC
make
make install
cd /tmp
rm -rf libvpx*
cd /tmp
wget http://downloads.sourceforge.net/opencore-amr/vo-aacenc-0.1.2.tar.gz
tar xzvf vo-aacenc-0.1.2.tar.gz
cd vo-aacenc-0.1.2
./configure --enable-shared
make
make install
cd /tmp
rm -rf vo-aaenc*
cd /tmp
git clone git://git.videolan.org/x264.git
cd x264
./configure --enable-shared --extra-cflags=-fPIC --extra-asflags=-D__PIC__
make
make install
cd /tmp
rm -rf x264*

Configure libraries

export LD_LIBRARY_PATH=/usr/local/lib/
echo /usr/local/lib > /etc/ld.so.conf.d/custom-libs.conf
ldconfig

Build ffmpeg

cd /tmp
git clone git://source.ffmpeg.org/ffmpeg.git
cd ffmpeg
git checkout n1.0
./configure --enable-version3 --enable-libopencore-amrnb --enable-libopencore-amrwb --enable-libvpx --enable-libfaac \
--enable-libmp3lame --enable-libtheora --enable-libvorbis --enable-libx264 --enable-libvo-aacenc --enable-libxvid --disable-ffplay \
--enable-shared --enable-gpl --enable-postproc --enable-nonfree --enable-avfilter --enable-pthreads --arch=x86_64 --extra-cflags=-fPIC
make
make install
cd /tmp
rm -rf ffmpeg*

All Done.

KaskingoDMM Update

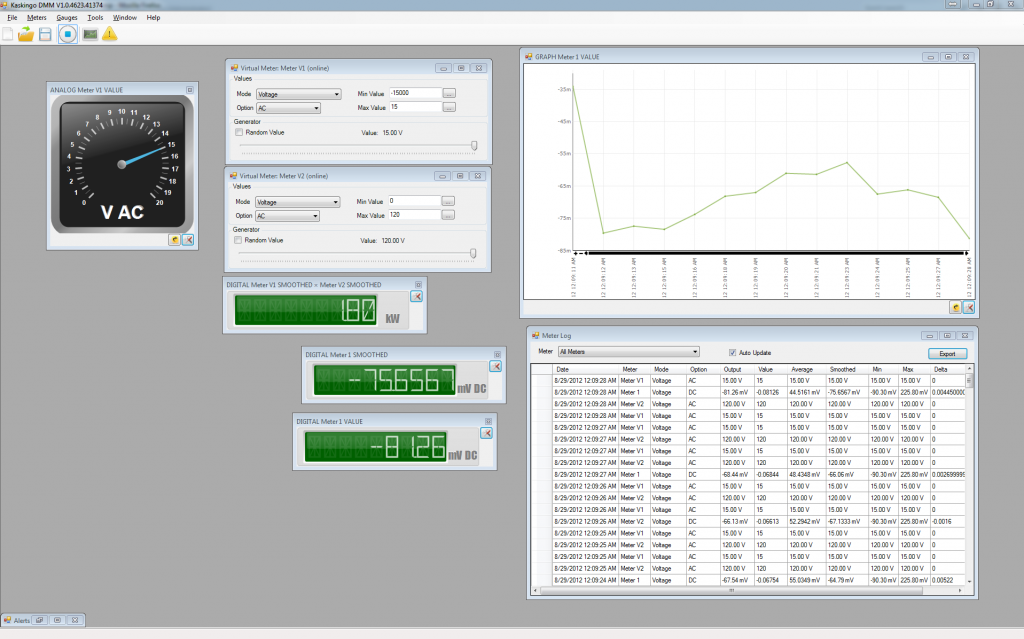
I’ve released an update to the multimeter application. Grab the latest version here.

Changes since last release:
– Added Chart Display
– Added Temperature Mode support
– Added AC/DC Display to Voltage/Current Gauges
– Added Hz/Duty % to Frequency Gauges
– Added Export to Excel in Meter Log
– Added Trigger Disable feature
– Performance Improvements
– Several Small Bug Fixes

I also ordered a UT70 Series multimeter to do some testing with. I’ll probably contact Uni-Trend at some point to see if they’re interested in helping adding support for more multi-meter models.