First step. Reset to factory to make sure we’re starting with clean config. To perform a factory reset all that’s required is to wait till it start booting and hit “2” to enter the Boot Menu
CPU Card ID:   0x508245
Boot Menu Version: 01 Jan 2007
Version 02.01.45 02/07/2007

Select an option. If no selection in 2 seconds then
operational code will start.

1 - Start operational code.
2 - Start Boot Menu.
Select (1, 2): 2
From here simply run options 10 and 9.
Boot Menu Version: 01 Jan 2007

Options available
1  - Start operational code
2  - Change baud rate
3  - Retrieve event log using XMODEM
4  - Load new operational code using XMODEM
5  - Display operational code vital product data
6  - Run flash diagnostics
7  - Update boot code
8  - Delete operational code
9  - Reset the system
10 - Restore configuration to factory defaults (delete config files)
11 - Activate Backup Image
[Boot Menu] 10
[Boot Menu] 9
Are you SURE you want to reset the system? (y/n):y
The system will reboot and perform a self check.
CPU Card ID:   0x508245
Boot Menu Version: 01 Jan 2007
Version 02.01.45 02/07/2007

Select an option. If no selection in 2 seconds then
operational code will start.

1 - Start operational code.
2 - Start Boot Menu.
Select (1, 2):


Operational Code Date: Wed Jun 20 10:57:52 2007
Uncompressing.....

                       50%                     100%
||||||||||||||||||||||||||||||||||||||||||||||||||
Attaching interface lo0...done

Adding 41114 symbols for standalone.
PCI device attached as unit 0.
PCI device attached as unit 1.
PCI device attached as unit 2.
PCI device attached as unit 3.
PCI device attached as unit 4.
Configuring CPUTRANS TX
Configuring CPUTRANS RX
MonitorTask - Active
ConsoleDebugger - Disabled

(Unit 1)>STACK: master on 0:1:e8:d5:a5:7a (1 cpu, 5 units)
STACK: attach 5 units on 1 cpu
This switch is manager of the stack.


User:
Log in and find out what’s it running. The default login/password for the Force10 S50 is “admin” and no password.
User:admin
Password:
Force10-S50#show switch

        Management    Preconfig        Plugged-in       Switch          Code
Switch    Status      Model ID         Model ID         Status         Version
------ ------------ ---------------- ---------------- --------------- --------
1      Mgmt Switch  SA-01-GE-48T     SA-01-GE-48T     OK              2.5.2.2

Force10-S50>show switch 1

Switch............................ 1
Management Status................. Management Switch
Hardware Management Preference.... Unassigned
Admin Management Preference....... Unassigned
Switch Type....................... 0x56950201
Preconfigured Model Identifier.... SA-01-GE-48T
Plugged-in Model Identifier....... SA-01-GE-48T
Switch Status..................... OK
Switch Description................ 48-port E/FE/GE (SA)
Expected Code Type................ 0x100b000
Detected Code Version............. 2.5.2
Detected Code in Flash............ 2.5.2
Serial Number..................... XXXXXXXXX
Up Time........................... 0 days 0 hrs 14 mins 16 secs
Let’s find ourselves a manual for version SFTOS 2.5.2.2….
SFTOS_Config_2.5.2.0_1-Mar-08
SFTOS_CLI_2.5.2.0_15-July-08
Force10-S50#show hardware

Switch: 1

System Description............................. 48-port E/FE/GE (SA)
Vendor ID...................................... 07
Plant ID....................................... 01
Country Code................................... 04
Date Code...................................... 072005
Serial Number.................................. XXXXXXXXX
Part Number.................................... 759-00001-00
Revision....................................... 0A
Catalog Number................................. SA-01-GE-48T
Burned In MAC Address.......................... 00:01:E8:D5:A5:7A
Software Version............................... 2.5.2.2

Additional Packages............................ Force10 QOS
                                                Force10 Multicast
                                                Force10 Stacking
                                                Force10 Routing

Pluggable Modules and Transceivers:
 None
--More-- or (q)uit
After factory reset all ports default to disabled. Making web management impossible. Need to bring the switch ports up.
Force10-S50>enable
Password:

Force10-S50#show port all

                    Admin   Physical   Physical   Link   Link    LACP
Interface   Type    Mode    Mode       Status   Status  Trap    Mode
---------- ------ ------- ---------- ---------- ------ ------- -------
1/0/1              Disable Auto                  Down   Enable  Enable
1/0/2              Disable Auto                  Down   Enable  Enable
1/0/3              Disable Auto                  Down   Enable  Enable
1/0/4              Disable Auto                  Down   Enable  Enable
1/0/5              Disable Auto                  Down   Enable  Enable
1/0/6              Disable Auto                  Down   Enable  Enable
1/0/7              Disable Auto                  Down   Enable  Enable
1/0/8              Disable Auto                  Down   Enable  Enable
1/0/9              Disable Auto                  Down   Enable  Enable
1/0/10             Disable Auto                  Down   Enable  Enable
1/0/11             Disable Auto                  Down   Enable  Enable
1/0/12             Disable Auto                  Down   Enable  Enable
1/0/13             Disable Auto                  Down   Enable  Enable
1/0/14             Disable Auto                  Down   Enable  Enable
1/0/15             Disable Auto                  Down   Enable  Enable
1/0/16             Disable Auto                  Down   Enable  Enable
1/0/17             Disable Auto                  Down   Enable  Enable
1/0/18             Disable Auto                  Down   Enable  Enable
1/0/19             Disable Auto                  Down   Enable  Enable
Force10-S50#config

Force10-S50(Config)#no shutdown all

Force10-S50(Config)#exit

Force10-S50#show port all

                    Admin   Physical   Physical   Link   Link    LACP
Interface   Type    Mode    Mode       Status   Status  Trap    Mode
---------- ------ ------- ---------- ---------- ------ ------- -------
1/0/1              Enable  Auto       1000 Full  Up     Enable  Enable
1/0/2              Enable  Auto                  Down   Enable  Enable
1/0/3              Enable  Auto                  Down   Enable  Enable
1/0/4              Enable  Auto                  Down   Enable  Enable
1/0/5              Enable  Auto                  Down   Enable  Enable
1/0/6              Enable  Auto                  Down   Enable  Enable
1/0/7              Enable  Auto                  Down   Enable  Enable
1/0/8              Enable  Auto                  Down   Enable  Enable
1/0/9              Enable  Auto                  Down   Enable  Enable
1/0/10             Enable  Auto                  Down   Enable  Enable
1/0/11             Enable  Auto                  Down   Enable  Enable
1/0/12             Enable  Auto                  Down   Enable  Enable
1/0/13             Enable  Auto                  Down   Enable  Enable
1/0/14             Enable  Auto                  Down   Enable  Enable
1/0/15             Enable  Auto                  Down   Enable  Enable
1/0/16             Enable  Auto                  Down   Enable  Enable
1/0/17             Enable  Auto                  Down   Enable  Enable
1/0/18             Enable  Auto                  Down   Enable  Enable
1/0/19             Enable  Auto                  Down   Enable  Enable

--More-- or (q)uit
That’s better. Now on to configuring management network
Force10-S50#config
Force10-S50(Config)#interface managementethernet
Force10-S50(Config-if-ma)#ip address 192.168.77.253 255.255.255.0
Force10-S50(Config-if-ma)#exit
Force10-S50(Config)#management route default 192.168.77.1
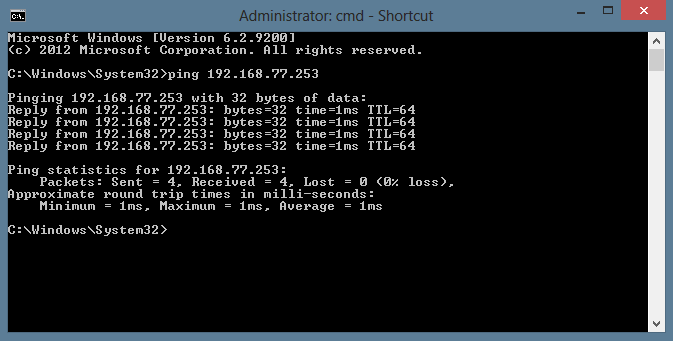
That should do it. A quick ping test shows the switch port is up and switch is responding.

Now to enable SSH/Web Management so serial console access won’t be necessary.
Force10-S50#config
Force10-S50(Config)#ip ssh server enable
Force10-S50(Config)#ip http server enable
Force10-S50(Config)#exit
Force10-S50#show ip http

Java Mode: Disabled
HTTP Mode (Unsecure): Enabled
HTTP Mode (Secure): Disabled
Secure Port: 443
Secure Protocol Level(s): TLS1 SSL3
Save configuration to Flash
Force10-S50#copy system:running-config nvram:startup-config

This operation may take a few minutes.
Management interfaces will not be available during this time.

Are you sure you want to save?(y/n) y
#
Configuration Saved!
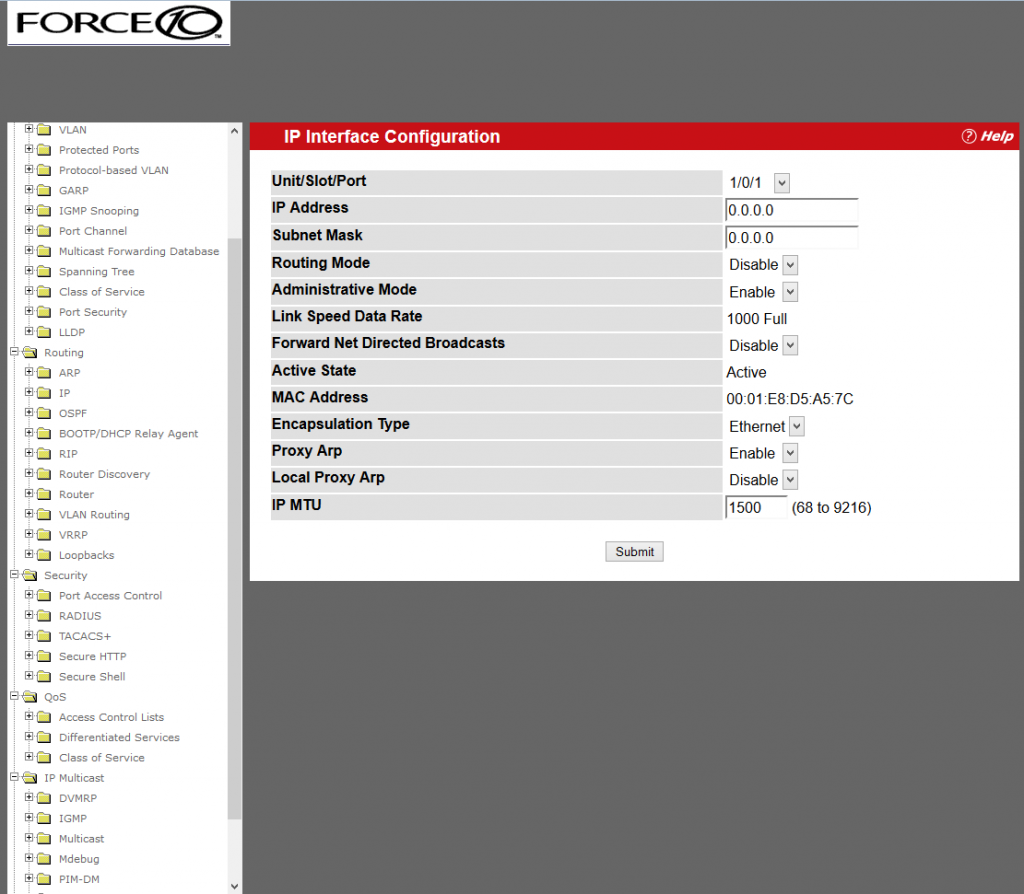
All good to go! Rest of the switch can be configured via web interface. Now, I’m not saying that the web interface is better than console, it’s just better for me. I’m not a network specialist and I have no interest in memorizing the CLI. The only time I’d use the CLI is if I need to perform an action that can not be performed via the web interface, even if it would be much faster to perform via the CLI.

rxd and txd pins are reversed.
I made an adapter from patchcord
http://darkstar.spb.ru/wp-content/uploads/2013/03/DSC_0027.jpg
Pingback: Upgrading Force10 S50 | Altered Realms
according to this: https://www.force10networks.com/CSPortal20/TechTips/0055_HowDoILoginToTheConsole.aspx
the RJ45 pinout is this:
Pin 1 = NC
Pin 2 = NC
Pin 3 = RXD
Pin 4 = GND
Pin 5 = GND
Pin 6 = TXD
Pin 7 = NC
Pin 8 = NC
DB9 serial is:
1 DCD Data Carrier Detect in
2 RXD Receive Data in
3 TXD Transmit Data out
4 DTR Data Terminal Ready out
5 GND Signal Ground
6 DSR Data Set Ready in
7 RTS Request to Send out
8 CTS Clear to Send in
9 RI Ring Indicator
So I do Pin2, Pin3 on the DB9. What about the rest?
Thanks for this good info. I’ll have this up and going eventually.
You need these:
1. USB to DB9 converter
2. DB9 to RJ45 converter
http://www.pacificcable.com/Picture_Page.asp?DataName=76000697
3. Rollover ethernet cable
https://www.computercablestore.com/straight-through-crossover-and-rollover-wiring