pfSense Install
Once the hardware upgrade is out of the way, it’s time to begin preparation for pfSense install. This is actually not quite a trivial as it was on the x500 Firebox. Thankfully, a few good guys on the pfSense did a lot of the discovery and troubleshooting legwork.
The problem with these boxes is that in order to boot from a Compact Flash card that’s larger than 256MB, adjustments need to be made in the BIOS as the default auto-detect doesn’t properly detect larger cards. The fact that accessing the BIOS on these board is not a trivial task further complicates the issue.
There are two approaches to accessing the BIOS. One involves soldering a USB header onto the board to attach a keyboard and soldering a VGA header to get video. Optionally using a PCIe video card in the expansion slot. The other approach is to reflash the BIOS so that on bootup all output is routed to the console. I opted for the second option. Especially since the modified BIOS is already available.
I used the instructions in this post to flash the BIOS. To recap. What is needed is a small Compact Flash card to load FreeDOS onto it with the BIOS firmware and Flash utility. Latest files can be downloaded from here. Or if the link is dead here are the files I used.
In order to write the FreeDOS image onto the small Compact flash card the card first has to be cleared as the physdiskwrite utility will not write to a partitioned card. Windows, unfortunately will not allow partitioning removable media from the Disk Management snap-in. To do this, use DiskPart from the Command Prompt:
Microsoft Windows [Version 6.2.9200]
(c) 2012 Microsoft Corporation. All rights reserved.

C:\Windows\System32>diskpart

Microsoft DiskPart version 6.2.9200

Copyright (C) 1999-2012 Microsoft Corporation.
On computer: ARES

DISKPART> list disk

  Disk ###  Status         Size     Free     Dyn  Gpt
  --------  -------------  -------  -------  ---  ---
  Disk 0    Online          238 GB      0 B
  Disk 1    Online           74 GB      0 B   *
  Disk 2    Online           74 GB      0 B   *
  Disk 3    Online           74 GB      0 B   *
  Disk 5    Online         1960 MB      0 B
  Disk 6    No Media           0 B      0 B
  Disk 7    Online         7600 MB      0 B
  Disk 8    No Media           0 B      0 B
  Disk M0   Missing            0 B      0 B   *

DISKPART> select disk 5

Disk 5 is now the selected disk.

DISKPART> list partition

  Partition ###  Type              Size     Offset
  -------------  ----------------  -------  -------
  Partition 1    Primary           1960 MB    16 KB

DISKPART> select partition 1

Partition 1 is now the selected partition.

DISKPART> delete partition

DiskPart successfully deleted the selected partition.

DISKPART> exit

Leaving DiskPart...
The Compact Flash card is now ready to receive the image. Once the image has been copied to the card, copy the latest Firmware BIN into the BIOS folder on the card. The FreeDOS image I downloaded at the time did not have the latest BIN as part of the image.
Remove the card from the computer, insert into the slot on the Firebox and power it up. By this time a serial cable should be connected to the Firebox (9600 8N1). After a short while the Firebox will beep three times and if all went well the command prompt should be visible on the terminal. From there run the biosid tool to confirm the BIOS version matches the one being modified.
C:\>cd bios
C:\BIOS>biosid
        ÚÄÄÄÄÄÄÄÄÄÄÄÄÄÄÄÄÄÄÄÄÄÄÄÄÄÄÄÄÄÄÄÄÄÄÄÄÄÄÄÄÄÄÄÄÄÄÄÄÄÄÄÄÄÄÄ¿
        ³       BIOSID v1.1 - BIOS Identification Utility       ³
        ³       Copyright (c) 1998 Unicore Software, Inc.       ³
        ³       Tel : 1-800-800-BIOS                            ³
        ³       http: //www.unicore.com/                        ³
        ÀÄÄÄÄÄÄÄÄÄÄÄÄÄÄÄÄÄÄÄÄÄÄÄÄÄÄÄÄÄÄÄÄÄÄÄÄÄÄÄÄÄÄÄÄÄÄÄÄÄÄÄÄÄÄÄÙ
BIOS DATE  : 12/21/2005CHIPSET ID : AlvisoBIOS ID    : 6A79GAKAC-00BIOS TYPE  : Phoenix Technologies, Ltd.OEM INFO   : **** BIOS Ver.ETAC0017 (2005/12/21> ****

        Press Any key to exit!


C:\BIOS>
If the BIOS version does not match, there’s a high possibility of rendering the Firebox useless if an incompatible Firmware is loaded. Probably good idea to stop and find compatible firmware.
Forging on, it might be a good idea to backup the old BIOS Firmware. The post linked above does not correctly state the syntax for performing BIOS backup. Use the syntax below. If used as described in the post it’ll appear to cause the Firebox to freeze. What actually happens is that the Flash Utility comes up with a GUI which can not be displayed over the serial connection.
awdflash /pn /sy backup1.bin /e
Flash new BIOS Firmware. The flashing process should take 3-4 minutes tops. The program will return to the command prompt once completed.
awdflash x750eb7.bin /py /sn /cc /e
After the new BIOS image is loaded, reboot the Firebox. If the BIOS image was flashed successfully the LCD screen will display “pfSense B7” on bootup. Reconnect the serial console at 115200 8N1 (No Flow Control) and if all goes well the bootup memory test should come up. In my case it did not. Upon reboot the console simply displayed “ääääääääääääääää” during the POST process. The solution to this for me was to complete the initial boot until the LCD on the front displayed “Booting OS”. Then rebooting the firebox one more time resulted in the proper BIOS screen showing up on the console terminal. I’ve verified this with all 3 Fireboxes as the issue was exactly the same one for each.
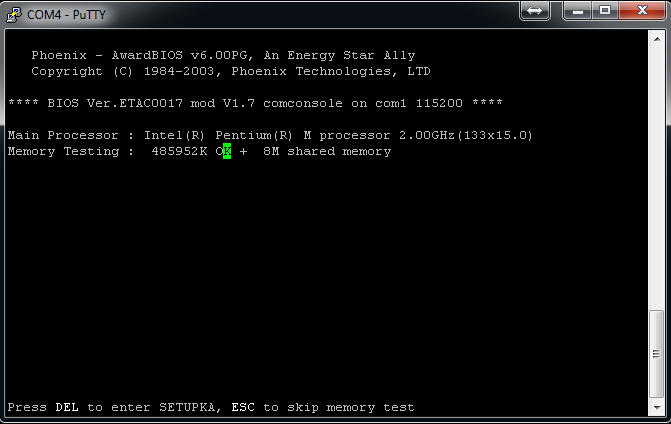
Even though the screen indicates that DEL key is to be pressed to enter BIOS setup, this can not be done over serial as DEL can not be sent. Use the TAB key instead.
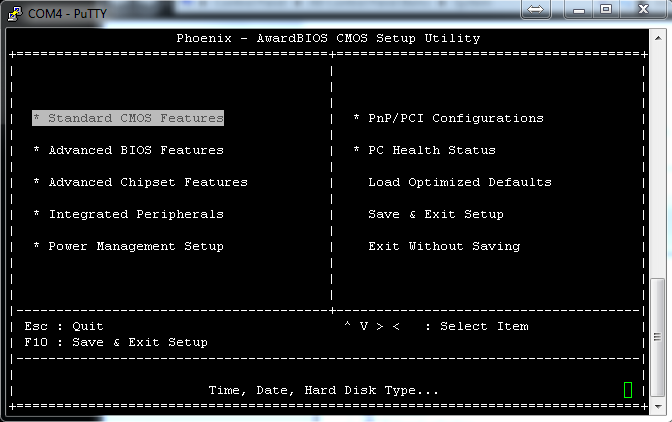
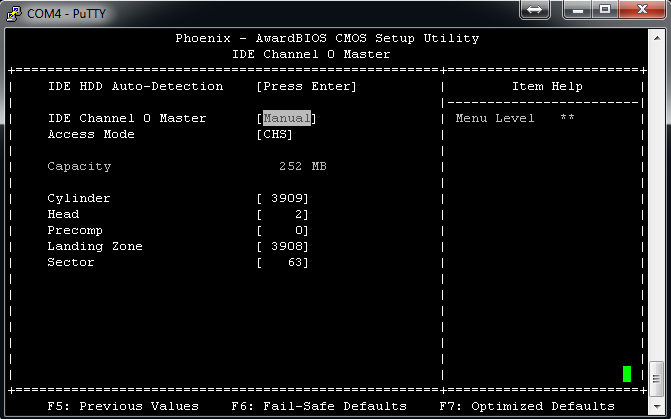
In order to add support for larger storage devices, make changes as shown. On the disk details only the “Head” setting needs to be changed to “2”, The other numbers are not important and should be left alone.
The ESC key doesn’t properly work over serial either, so to go back up a level in the screen, I used the ESC key followed by the UP key. Once at the root level simply save the BIOS settings and exit.
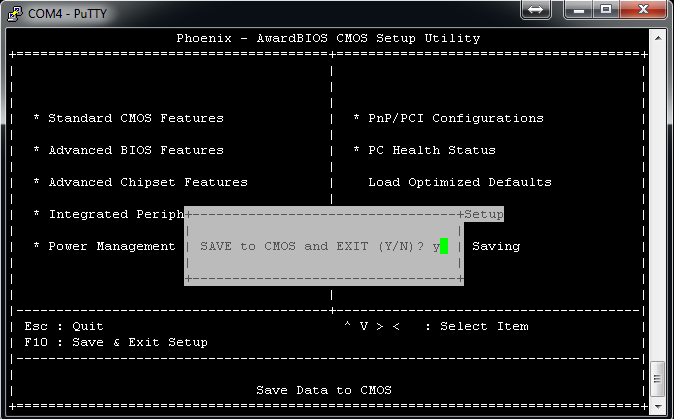
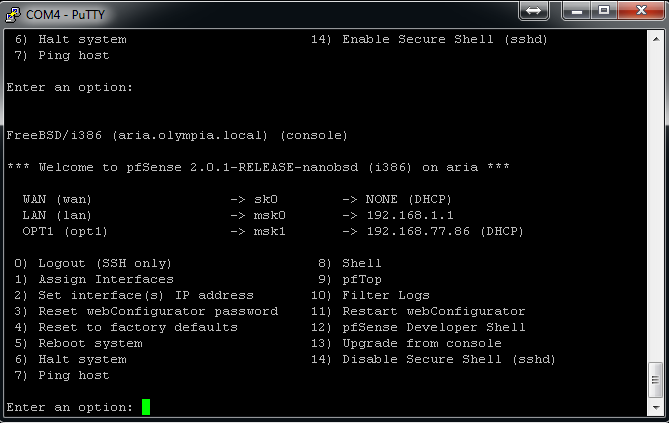
When exiting the BIOS the firewall will start booting the OS right away. At this point the pfSense Card was already replaced in the Firebox so a quick change of the serial connection to 9600 8N1 (No Flow Control) and the pfSense boot process can be seen.

Those extra 4 ports on the expansion board are quite a bit faster, too bad about the stability problem. Your test was with an early 2.0 release – do you know if they are stable under 2.1 now?
Yeah, 2.1 seems to have fixed the issue.
Well. Great compare. What about heat from 2.0 ghz ? It isnt to high ?